Connecting microphones
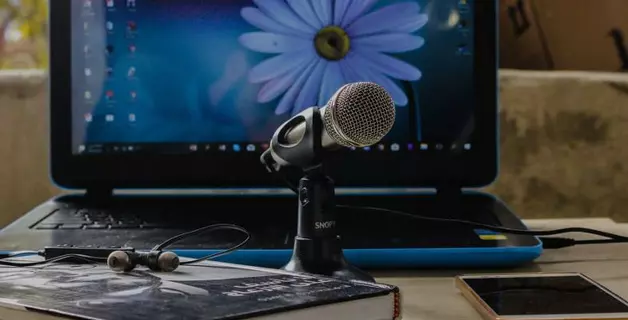
Most modern desktop computers are equipped with a microphone recording feature. This process can be accomplished using both internal and external audio systems. An important part of such systems is the DAC – a device that converts analog signals into digital format. Recordings are usually made in the WAV format, but specialized programs exist to convert these files to the more common MP3 format.
Before connecting the microphone to a Windows-based PC, it is advisable to ensure that the drivers are up-to-date. This is especially important if the connection is not made through a standard socket on the front panel of the PC case.
It is also important to check the compatibility of the microphone and computer, especially if you plan to use the microphone for karaoke. The key technical parameter is microphone impedance, but typical PC sound cards work with most consumer microphones without special requirements. Only high-impedance studio mics may need an external audio interface.
Classic wired microphone connection
There are various ways to connect a microphone to a computer. If you have a wired microphone or headset for recording, it should be connected to the MIC IN port on the sound card. This port is usually pink in color and has a microphone icon.
The standard size of the audio jack on computers is 3.5 mm. If your microphone has a 6.5mm plug, you will need a special adapter. Some headset manufacturers anticipate this need and include an adapter in the package.
Many modern computers have sound cards with so-called “hybrid” ports. This allows you to connect a microphone to any available jack. However, after connecting, it is important to indicate in the driver or headset software settings which port you used.
As for connecting the microphone from the headset, you can simply insert it into the hybrid port on your computer.
Wireless connection
Let’s look at the process of connecting a wireless microphone to a computer. To connect, your PC must be equipped with a Bluetooth adapter version 2.1 or higher. This process is a little more complicated than simply connecting a wired microphone.
Here’s how to connect a wireless microphone to your Windows 10 computer:
- Enable Bluetooth on your computer;
- Open the “Notification Panel”;
- Right-click on the Bluetooth icon;
- Go to “Open Settings”;
- Click on the “Add” button;
- Select the Bluetooth option;
- Turn on your wireless headset and make sure it is ready to connect;
- Wait until the computer detects the device;
- If necessary, enter a password to connect.
If your wireless microphone comes with its own Bluetooth adapter, it is not required that your computer have a built-in Bluetooth transmitter. Simply connect this external adapter to your computer’s USB port and install the necessary drivers and software. After this, turn on the headset, make sure a connection is established with the Bluetooth receiver and begin testing audio recording.
Connecting a microphone to a PC via USB port
USB microphones occupy a special niche in the market. They do not require standard 3.5 or 6.35 mm audio connectors. This is a convenient choice for those who do not want to use an external audio card, since these microphones already include a built-in sound card with MIC IN support.
To connect a USB microphone to a computer, just insert its plug into the appropriate USB port and install the required software and drivers.
If you have a headset with a microphone and a USB connection, the connection procedure is even simpler. You just need to connect the headset to the USB port of your computer and, if necessary, install the appropriate drivers.
Connecting a microphone via TRRS combo jack
Some models of laptops and computers are equipped with a universal headset port, which is used to simultaneously connect speakers, microphones and headphones. This port uses a different pin configuration .
To connect the microphone to a computer with Windows 10 or older versions of the operating system, when TRRS combo jack is available, you will need a special adapter-splitter. It is recommended to activate the audio device auto-connection function before connecting a headset to this kind of port.
Connecting a microphone via an external sound card
If the audio jack on the system unit is damaged or the built-in audio card is faulty, it is possible to use an external audio card to connect a microphone. In addition, if you have a need, you can connect not one, but several devices, provided that the system unit has available PCI ports.
Connecting wireless karaoke microphones with wireless receivers
Such a device includes a microphone with a built-in battery, as well as a signal transmission and reception unit and a wireless transmitter. To connect a microphone to a computer running Windows 7 or later, follow these steps:
- Connect the encoder to the 3.5mm audio jack or USB port. The USB connection process has already been described previously;
- Install the necessary drivers;
- Turn on the microphone;
- Make sure the connection between the microphone and the computer is established;
- Test the audio recording.
How to connect a microphone to a laptop?
Modern laptops and netbooks often come with built-in audio recording devices of fairly high quality, designed for communication in applications such as Skype or for using voice commands. However, this does not limit the ability to connect more professional devices to them, such as studio or karaoke microphones. Let’s look at how to connect a microphone to a laptop.
Connecting a microphone via the audio jack
There are different methods to connect a microphone to a Windows laptop, depending on the type of audio jack:
- Standard Connection: Most laptops and netbooks come with a 3.5mm audio input, which is usually indicated by a pink color or a microphone icon and is located next to the headphone jack. To connect a wired microphone to a laptop on Windows 10, you need to insert the microphone plug into this port, and then install the necessary drivers and configure the device;
- Non-standard connection: This method is relevant for connecting karaoke microphones intended for use with DVD players, especially in older models of headsets. Here the microphone has a 6.5mm plug, while the laptop is equipped with a 3.5mm port. The solution is a special adapter, adapter or splitter, where one end is connected to the headset and the other to the USB port of the laptop.
To connect two microphones to a laptop, you will need to use a splitter adapter with two audio inputs.
Connecting a microphone to a laptop via USB
Microphones that use a USB connection to a host device are not as common on the market, but they are one of the most convenient wired connection options. Here is the procedure for connecting an external USB microphone to a laptop:
- Connect the USB microphone connector to the corresponding USB port on your laptop;
- Turn on the microphone;
- Start the process of checking and setting up the microphone on your laptop.
Setting up a microphone on a laptop via Bluetooth
Many people are interested in connecting a Bluetooth microphone to a laptop. This method is especially convenient for karaoke headsets, as it avoids problems with wires and provides freedom of movement relative to the laptop. Most modern laptopssupport Bluetooth, but before purchasing a wireless headset, you should make sure that your laptop supports such a connection. The process for connecting a wireless microphone to a laptop is similar to the instructions for desktop computers.
How to connect your smartphone's microphone to a computer?
You can use your smartphone’s microphone to record audio by installing the free WO Mic app on both devices. Here’s how to do it:
- USB: First, connect your smartphone to your computer via a USB cable. Launch the WO Mic app on your smartphone. Next, open the WO Mic program on your computer and in the “Select transport” window, select the USB option, then confirm by clicking OK. As soon as the “Connected” notification appears on the screen, you can start recording;
- Bluetooth: Make sure your computer supports Bluetooth. Next, follow the same steps as for connecting via USB, only select the Bluetooth option in the WO Mic program on your computer.
