How to Record Audio on Your Computer: Beginner's Guide to Digital Recording

Recording audio on your computer requires three basic things: a digital audio workstation (DAW) software, an audio source (microphone, instrument, or built-in mic), and knowledge of proper settings for recording quality.
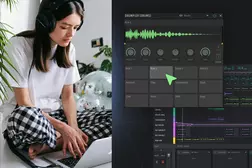
Digital audio recording has revolutionized music production, podcasting, and content creation. What once required expensive studio equipment now happens on any laptop (and with apps like Amped Studio all you need installed on that laptop is just a web-browser). Whether you're recording vocals, instruments, or voiceovers, understanding the basics of digital recording helps you get professional results from home.
In this guide, you'll learn:
- What digital recording actually is and how it works
- Digital vs analog recording: key differences
- Essential equipment for a home recording studio setup
- Best audio interfaces for home recording
- Step-by-step process to record digital audio
- Choosing the right free DAW for beginners
- Tips to improve your recording quality immediately
What is Digital Recording?
Digital recording converts sound waves into binary data (1s and 0s) that computers can store and manipulate. When you speak into a microphone, it captures vibrations in the air and converts them to electrical signals. Your computer's audio interface (or external sound card) transforms these analog signals into digital information.
This process happens thousands of times per second — typically 44,100 or 48,000 times (called the sample rate). Each sample captures the amplitude of the sound wave at that precise moment. The more samples per second, the more accurately your recording represents the original sound.
Digital audio recording offers major advantages over older analog methods: unlimited copies without quality loss, easy editing and manipulation, instant sharing and collaboration, and no physical media needed.
Digital vs Analog Recording
Understanding the difference between digital vs analog recording helps you appreciate why modern production is available to bedroom producers today at the quality level that was once reserved for high-end studios.
Analog recording captures continuous sound waves onto magnetic tape — either reel-to-reel tape in professional studios or cassette tape for consumer use. The recording is a physical magnetization pattern that directly represents the sound wave. While analog tape has a warm character many producers love (partly due to harmonic saturation from the tape itself), it gradually degrades with each playback, requires careful storage, and copies lose quality with each generation.

Digital recording samples the sound wave thousands of times per second and stores it as numbers. This means perfect copies forever, unlimited editing without quality loss, and instant recall of any project state. The trade-off? Early digital recordings (1980s-90s) sounded harsh due to low bit depth and poor converters. Modern digital audio recording at 24-bit depth captures more detail and dynamic range than analog tape ever could.
For beginners, digital wins on practicality: lower cost, no tape maintenance, easier workflow, and professional results without years of experience managing tape machines.
How Does Digital Audio Work?
Think of digital audio like a flip-book animation. Each "page" (sample) captures a moment in time. Play them back quickly enough, and you hear continuous sound.
When you record digital audio, your computer performs analog-to-digital conversion (ADC). The microphone captures continuous sound waves (analog), and the audio interface samples these waves at regular intervals, converting them into discrete digital values.
Your computer stores these samples as audio files (WAV, MP3, FLAC, etc.). The bit depth determines how much detail each sample contains — 16-bit is CD quality, 24-bit is professional standard. Higher bit depth means more dynamic range between the quietest and loudest sounds, giving you approximately 96dB of available dynamic range at 16-bit and 144dB at 24-bit.
The Nyquist theorem states you need a sample rate twice the highest frequency you want to capture. Since human hearing tops out around 20kHz, a 44.1kHz sample rate captures basically everything we can hear
So what are your actual best settings? For beginners, start with 44.1kHz sample rate and 24-bit depth. This gives you professional quality without massive file sizes.
Home Recording Studio Setup for Beginners
Building your first digital recording setup doesn't require thousands of dollars. Start minimal, learn the fundamentals, then upgrade strategically.
Minimum setup (you already own this):
- Any computer with internet access
- Built-in microphone or headphone mic
- Browser-based DAW like Amped Studio (free, no download required)
- Pair of headphones you already have
This bare-minimum setup lets you record vocals, acoustic instruments, voiceovers, and podcasts immediately. The quality won't win Grammy awards, but it's perfect for learning how to record digital audio without financial commitment.
Starter setup ($150-300 total):
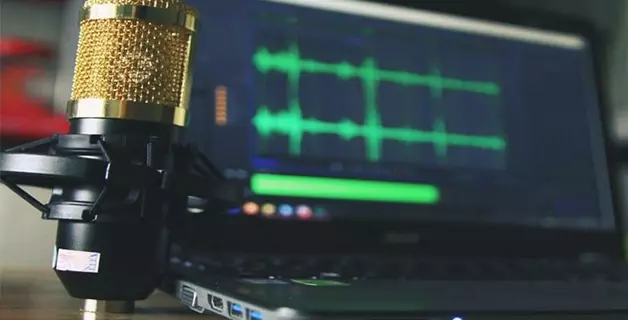
- USB microphone ($50-150): Audio-Technica ATR2100x, Blue Yeti, or Samson Q2U
- Closed-back headphones ($50-100): Audio-Technica ATH-M40x or Sony MDR-7506
- Pop filter for the microphone ($10-20): Reduces plosives dramatically
- Same free browser-based DAW
This setup produces genuinely professional-quality podcasts and decent music demos. The USB mic plugs directly into your computer — no audio interface needed.

Intermediate setup ($400-700 total):
- Audio interface ($100-200): Focusrite Scarlett 2i2, PreSonus AudioBox, or Behringer U-Phoria
- XLR microphone ($100-200): Shure SM58 (live/dynamic) or Audio-Technica AT2020 (studio/condenser)
- XLR cable ($15-30): Mogami or Planet Waves
- Studio headphones ($50-100): Same as starter setup
- Mic stand and pop filter ($40-60)
- Optional: A desktop DAW if you need more fuctionality beyond basic recording (e.g. Reaper, or free Cakewalk)
An audio interface unlocks multiple simultaneous inputs, better preamps, and lower latency. This matters when recording full bands or using multiple microphones.
What you (probably) don’t need yet:
- ❌ Acoustic treatment (learn mic placement first)
- ❌ Multiple microphones (one good mic beats three mediocre ones)
- ❌ Hardware effects processors (your DAW handles this)
- ❌ Expensive cables (mid-range cables sound identical to premium)
Best Audio Interfaces for Home Recording
When you're ready to upgrade beyond a USB microphone, an audio interface dramatically improves your digital audio recording quality and flexibility.
Budget tier ($100-150):
- Focusrite Scarlett 2i2 (3rd Gen): Industry standard for beginners. Clean preamps, solid drivers, includes basic software bundle. Two inputs handle vocals + guitar simultaneously.
- Behringer U-Phoria UMC202HD: Half the price of the Scarlett with surprisingly good performance. Great if budget is tight.
Mid-range ($200-350):
- Universal Audio Volt 276: Vintage preamp character, built-in compressor, exceptional build quality. Worth the premium if you record vocals primarily.
- SSL 2+: Legendary SSL sound in a compact interface. The "Legacy 4K" button adds analog-style warmth.
Key features you may want to consider:
At least 2 inputs (to record vocals + guitar, or stereo sources)
48V phantom power for condenser microphones
Direct monitoring (hear yourself with zero latency)
USB-C connectivity for future-proofing
Don't obsess over specs like THD or frequency response — the differences between modern interfaces are inaudible in real-world use. Focus on inputs, preamp quality, and driver stability.
Step-by-Step: How to Record Digital Audio
1. Choose a DAW for Beginners
For complete beginners, browser-based DAWs offer the fastest path to recording. No installation, no compatibility issues, works on any device.
Amped Studio runs entirely in your browser — think Google Docs for music production. Create an account, open a project, and you're recording in under 2 minutes. Everything saves automatically to the cloud, and you can access your projects from any computer.

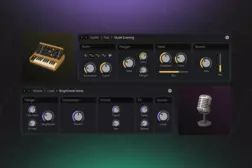
The platform supports VST3 plugins via VST Remote (currently supports one active plugin per project). You also get AI-powered stem separation (AI Splitter) for extracting vocals or instruments from mixed tracks, plus shared projects for real-time collaboration via link.
2. Set Up Your Audio Input
Click the audio settings icon in your DAW. Select your recording device:
Built-in microphone: "Internal Mic" or "Default"
USB mic: Will appear by name (Blue Yeti, Audio-Technica, etc.)
Audio interface: Select the interface, then choose your input channel

Test your input levels. Speak or play at your normal volume. The meter should peak around -12dB to -6dB (yellow zone). If it hits red (0dB), you're clipping — lower your input gain.
3. Create an Audio Track
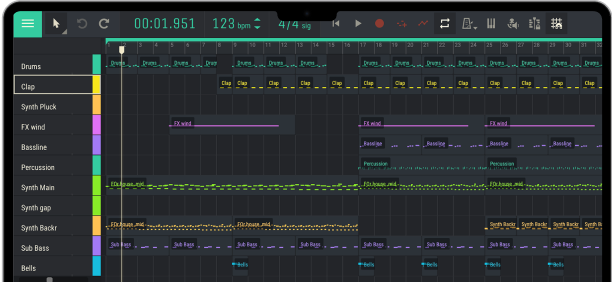
In Amped Studio, click the "+ Add New Track" button and select "Audio / Mic." This creates an empty track ready to record.
Name your track something obvious ("Lead Vocal," "Acoustic Guitar Take 1"). Trust me, you'll thank yourself later when you have 20 tracks.
4. Hit Record
Arm the track for recording (the round R button). Click the main record button in the transport panel. You'll hear a count-in (usually 4 clicks), then recording starts. This is the list of links to choose a few from strategically to insert into our final draft. Strategically, I think about two or three links per article of this length will be good. This is interlinking, linking from this article to other pages among our blog articles. So choose the number of appropriate links strategically. Don't make hyperlinks, just show me where in the text to put them.
Perform your part. Don't stop if you make a mistake — you can fix it in editing. Learning to edit and splice takes early will help you avoid having to do 50 takes get a perfect performance in one go.
Press spacebar (or the stop button) when done.
5. Listen Back and Adjust
Play your recording. Listen for:
- Clipping (distortion from too-loud input)
- Background noise (computer fans, room echo, traffic)
- Timing (did you rush or drag the tempo?)
If something's wrong, don't delete it. Record another take on a new track. You can later combine the best parts of multiple takes (called comping).
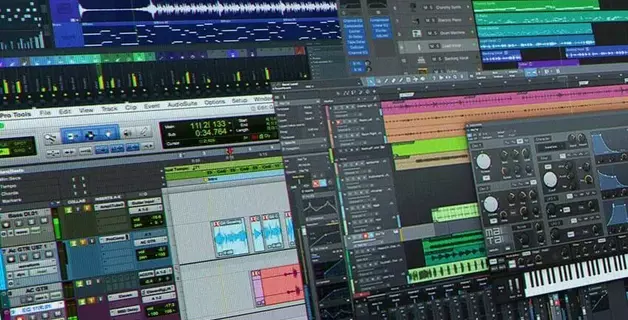
Choosing the Best Free DAW for Beginners
Different DAWs suit different needs:
Best for instant recording (no download):
Amped Studio: Browser-based, real-time collaboration via shared project links, automatic cloud saves. Start recording in under 2 minutes — no downloads, no setup.
Best for comprehensive features (requires download):
Reaper: Full-featured, unlimited free trial, paid option with more features
Cakewalk by BandLab: Completely free, professional-grade, Windows only
Best for simplicity:
Audacity: Open-source, perfect for podcasts and simple edits, lightweight
GarageBand: Mac/iOS only, beautifully designed, limited to Apple ecosystem
For absolute beginners who want to record in the next 5 minutes, browser-based wins. You can always migrate to desktop DAWs later when you outgrow the browser.
How to Improve Audio Recording Quality
Room acoustics matter more than expensive mics. Record in a room with soft surfaces — carpet, curtains, furniture, bookshelves. Hard walls create echo and reverb that scream "amateur recording." You don't need professional acoustic panels yet — just avoid recording in empty bathrooms or tiled kitchens.
Mic placement is critical. For vocals, position the mic 6-8 inches (15-20 cm) from your mouth, slightly off-axis (not directly in front) to reduce plosives (harsh "P" and "B" sounds). For acoustic guitar, point the mic at the 12th fret from 6-12 inches away. For electric guitar amps, place the mic 1-2 inches from the speaker cone, slightly off-center.
Record in 24-bit, even if releasing in 16-bit. The extra headroom prevents clipping and gives you more flexibility in mixing. You can always downconvert later, but you can't add bit depth after recording.
Use a pop filter ($10-20) for vocals. This simple mesh screen eliminates plosive bursts of air and improves vocal clarity dramatically. DIY alternative: stretch pantyhose over a wire hanger.
Monitor with headphones while recording to catch problems in real-time. But use speakers when mixing — headphones exaggerate both bass and stereo width in ways that can mislead your decisions.
Record multiple takes. Even professionals rarely nail it on take one. Having options gives you confidence during editing.
Key Takeaways
Recording audio on your computer doesn't require a professional studio or expensive gear. With a browser-based DAW like Amped Studio, you can start digital audio recording in minutes using the equipment you already own.
Focus on the fundamentals first: proper input levels, quiet recording environment, and good mic placement. Quality comes from technique and practice, not from buying more gear.
Create your free account, plug in a mic (or use your built-in one), and record your first track today.
FAQ: Digital Audio Recording Basics
No. Your computer's built-in microphone or a USB mic works fine for beginners. Audio interfaces improve quality and offer more inputs, but they're not required to start recording today.
Use 44.1kHz (or 48kHz) sample rate and 24-bit depth. This is professional quality and compatible with all platforms. Higher settings create massive files without audible improvement for 99% of listeners.
Yes. Browser-based DAWs like Amped Studio run entirely in your web browser with no downloads. You get full recording, editing, and mixing capabilities from any device with internet access.
Record in a quiet room with soft surfaces. Turn off fans, air conditioning, and refrigerators. Use a noise gate plugin to cut audio below a threshold. For serious noise reduction, check out dedicated tools like iZotope RX for post-processing.
A USB mic plugs directly into your computer — simple, works immediately, limits you to one mic. An audio interface connects via USB but accepts multiple XLR mics and instruments, offers better preamps, provides phantom power for condenser mics, and gives you more recording options as you grow.