Vocal Chain Order: How to Build a Basic Vocal Chain in Amped Studio


Cleanup EQ → compression → de-essing → tone-shaping EQ → saturation → delay → reverb → limiter. This is the standard vocal effects chain order.
That sequence isn't just tradition — it's where each effect needs to be in the chain to work properly. This is because each effect in the chain processes the output of every effect before it, and different types of effects shape the signal in different ways. Put compression before cleanup EQ and the compressor wrestles with frequencies it shouldn't be reacting to. Put reverb halfway down the chain and everything after it processes both the vocal and its entire reverb tail.
This guide walks through the vocal chain order step by step, explains why each effect sits where it does, and shows how to build the chain in Amped Studio. You won't always need every effect — the chain shows where each one goes when you use it. Listen to your vocal in the mix first, then add what it actually needs.
What is a vocal chain?
A vocal chain is a sequence of audio effects placed on a vocal track, where the signal flows through each effect in turn. The first effect processes the dry vocal. The second effect processes what the first one outputs. The third processes what the second produced — and so on down the chain. Each effect only sees what the previous one passed to it, which is why the order matters as much as the settings.
A proper vocal chain is an essential part of mixing. Its job is to make the vocal sit properly against the other instruments — with more clarity, controlled dynamics, and smoothness. Delay and reverb add a creative dimension to that work: by introducing a spatial element to your vocal they can transform the initial vocal performance quite a lot.
Why vocal chain order matters
Placing effects in sequence on your vocal track means that the original sound plus effect gets passed on to the next effect as input. This makes the order of effects very important. Corrective effects that remove what shouldn’t be in there, are followed by compression that controls (or evens out) the overall signal and the followed by additive effects, that add flourishes to the signal or creatively enhance its timbre.
Take the low end of a vocal recording — anything below 80-100 Hz. A human voice usually doesn't produce useful information down there, but the microphone captures plenty: room rumble, plosive bursts on "p" and "b" sounds, background noises. Cut those frequencies with a high-pass filter (cleanup equalization) before the compressor and the compressor reacts to the vocal cleanly. If you place that cleanup EQ after the compressor instead, and the compressor will be struggling with low rumble your microphone caught or overreacting to plosive peaks — wrestling with what the cleanup EQ is meant to clean up. Same effects, different order – different results.
Tip: Record your vocals clean first. Don't process during tracking. Capture dry vocals, then build your chain at mix time. Audio effects in DAWs are non-destructive, so you can change every decision later — but only if the recording underneath stays untouched.
The vocal chain order, step by step
The full basic vocal chain (with notes on how often you will need each effect) looks like this:
- Equalizer (cleanup) — subtractive cuts to remove problem frequencies (essential)
- Compressor — even out dynamics (essential)
- De-esser — tame sibilance (often needed)
- Equalizer (tone shaping) — add presence and air (often, with restraint)
- Saturation — harmonic richness (situational)
- Delay — depth and rhythmic interest (situational, creative)
- Reverb — spatial placement (usually present)
- Limiter — final peak control (safety net)
Three Equalizer instances appear in this vocal effect chain at three different positions, each doing a different job: frequency cleanup, de-essing, tone shaping.
Step 1 — Equalizer (cleanup)
The first effect in most vocal chains is a cleanup EQ. Its job is subtractive: cut frequencies that cause problems before any other effect amplifies them.
Three typical moves:
- High-pass filter at 80–100 Hz to remove low-end rumble, mic stand vibrations, and proximity effect
- Dip muddiness around 200–400 Hz with a 3–6 dB cut and moderately wide Q
- Notch boxiness or honkiness in the 500 Hz–1 kHz range with a narrow Q, 3–6 dB cut — sweep with a boost first to find the offending frequency

Why first: removing problem frequencies before compression means the compressor reacts to the vocal itself, not to mud or rumble.
Step 2 — Compressor
Compression evens out dynamics. The human voice is wildly inconsistent in volume, and the compressor pulls quiet phrases and loud peaks toward a more even level so every word lands clearly in the mix.
Starting settings for a vocal:
- Ratio: 3:1 to 4:1
- Attack: 15–30 ms — slow enough to let consonants punch through
- Release: 50–100 ms
- Threshold: Adjust to get 3–6 dB of gain reduction on the loudest moments
- Makeup gain (post gain):Bring the overall level back up after compression pulls peaks down

Why here: cleanup EQ has removed the worst frequency problems, so compression now reacts to the vocal cleanly rather than wrestling with mud or rumble.
Step 3 — De-esser
De-esser is a specialized vocal equalizer used for taming harsh sibilance produced by pronouncing "s," "sh," and "t" sounds. There are specialized plugins built for this very job, but any equalizer with narrow Q control can handle this task well. In Amped Studio we use a second Equalizer to do this work:
- Find the harsh frequency. Sibilance usually sits between 5–10 kHz. Sweep a narrow boost across that range while the vocal plays and listen for the spot where harshness becomes painful — that's where the cut goes. Also, focus specifically on words and phrases with the harshest sibilance to find the frequencies that need treatment.
- Narrow Q, 3–6 dB cut at the offending frequency.
- Static cut works for most vocals. If only certain phrases have harsh sibilance, the cut can be automated, but a fixed cut handles the majority of cases.

Why after compression: in most cases sibilance only becomes prominent enough to need fixing after compressor. De-essing has to come after the compressor to tame what the compressor amplified.
Tip: Mix the vocal in context, not only in solo. Solo is useful for hearing fine detail when adjusting a specific setting, but every decision needs to be auditioned against the full arrangement.
Step 4 — Equalizer (tone shaping)
The third Equalizer instance is additive — boosts that bring out the vocal's best qualities now that problems have been removed and dynamics controlled.
Two typical moves:
- Boost 1–2 dB at 2–5 kHz for presence and clarity — this is where vocals cut through a mix
- Gentle high-shelf at 10–12 kHz for air — a subtle lift that opens up the top end without harshness

Why after de-essing: tone shaping adds energy in the same frequency regions where sibilance lives. Boost before de-essing and you amplify the harshness you're about to fight. Boost after and you lift the smooth, controlled version of the high end.
Step 5 — Saturation
Saturation adds harmonic richness (often called warmth) — extra frequency content generated by the effect itself. On a vocal, used subtly, it makes the voice feel louder and more present at the same fader level. Unlike guitar, where drive is the sound, saturation on a vocal is seasoning — enough to color the signal, not so much the listener notices it.
In Amped Studio, the Distortion device handles this well. Start from the Purr preset, which gives a gentle, transparent character that suits vocals, and dial in from there:
- Pre Gain — the primary control. Push it gradually until the vocal feels slightly more solid, then back off until the effect is barely noticeable in solo
- Tone fully open — rolling Tone back rolls off the highs and darkens the vocal
- Boost off, or lowest setting — useful on guitar, heavy-handed on a vocal
- Mix at 100%; Intensity and Feedback to taste

Why here: tone-shaping EQ lifted the right frequencies. Saturation now adds harmonic content to those frequencies specifically, reinforcing the presence and air you just boosted.
Tips on saturation:
- Different saturation tools expose different controls, but input gain is almost always the parameter doing the audible work
- Saturation is easy to overdo — if you can hear it as a distinct effect in solo, roll back the input gain until it disappears, then nudge it up just a touch
- Not every vocal needs saturation. A vocal that already sits forward in the mix may be best left alone at this step
Step 6 — Delay
Delay adds rhythmic echoes and a sense of space. It's creative rather than corrective — useful on hooks, throws on the last word of a phrase, and choruses.
Starting settings:
- Delay time: dial in by ear until the echoes feel locked to the song's pulse
- Feedback: 15–25% — enough for a few audible repeats, not enough to ping out into a long tail
- Mix: conservative — see the tip below

Why before reverb: delay creates discrete, audible echoes. Reverb creates a tail of ambient wash after the sound. Place delay before reverb and the reverb will process the echoes too.
Tip: Delay time is more of a creative decision than a rule. The right setting depends on the vocal, the arrangement, and what sits well against the rest of the track — try various time settings or rhythmic divisions and let your ear pick the one that feels right for your arrangement.
Step 7 — Reverb
Reverb places the vocal in a spatial environment — a room, a hall, a plate. It decides where the vocal sounds like it's coming from.
Most reverbs come with presets for different spaces. Pick one that fits the track — intimate spaces for close, dry vocals, larger ones for ballads and open arrangements — then shape it with three common controls:
- Size — how big the space feels; the most character-defining control after the preset
- Damp — how much high frequency the tail keeps; more damping gives a darker tail that sits better behind a vocal
- Mix — the wet/dry balance; keep it low, around 10–20%, so the reverb adds space without drowning the dry vocal

Why second-to-last: reverb defines the space the vocal sits in. Everything before reverb shapes what the vocal sounds like; reverb decides where that vocal is.
Tip: Reverb earns its place creatively when it's automated, not set and forgotten. Keep the baseline mix conservative — 10–20% — then push the wet level higher on specific moments: the last word of a phrase, an adlib, a transition into a chorus. These reverb throws add space at musical moments without drowning the vocal everywhere else.
Step 8 — Limiter
The Limiter is a safety catch. It doesn't shape the vocal creatively — it stops occasional loud peaks from clipping into the master bus.
Two controls do the essential work, regardless of which limiter you're using:
- Threshold (sometimes labeled ceiling) — the level above which the signal can't pass. Set it between -0.5 and -1 dB — so the loudest vocal peaks are caught without affecting normal phrases
- Release — how quickly the limiter lets go after catching a peak. Leave it at default unless you hear pumping; faster release on busy vocal sections, slower on sustained ones

Why last: everything before this point has shaped the vocal creatively. The limiter exists purely to prevent clipping. Place it anywhere else in the chain and you're either limiting too early — squashing the dynamics your compressor was building — or letting peaks through to the master.
Building the chain in Amped Studio
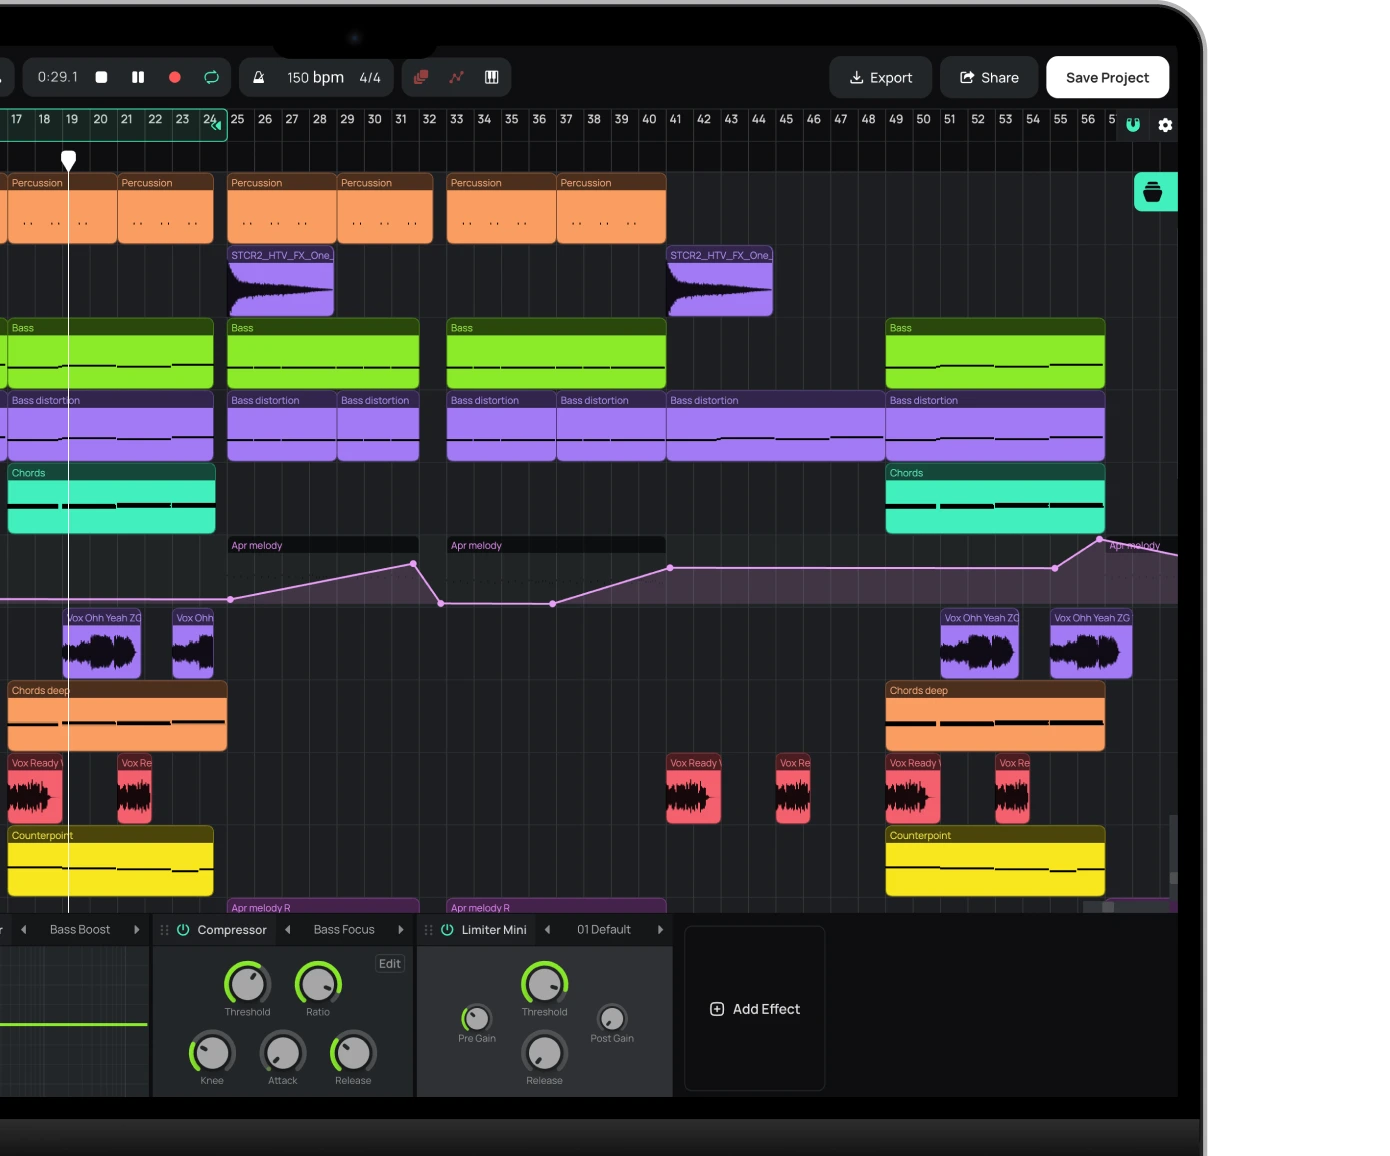
In Amped Studio, effects are added in the Device Panel at the bottom of the studio. Each device in the chain processes the signal left to right — the leftmost effect goes first, the rightmost goes last.
To build the vocal signal chain in Amped Studio:
Select the vocal track in the arrangement.
Open the Device Panel by double-clicking the vocal recording clip.
Click Add Effect and select Equalizer — your cleanup EQ. Make the EQ adjustments (cut low end, cut boxiness in the low mids). Make sure to un-solo the vocal track and listen to your adjustments in context of the whole mix.
Click Add Effect again and add Compressor. Make adjustments following the guide above, while auditioning in the context of the mix.
Continue adding effects in order — but only the ones your vocal actually needs. Remeber that some effects like tone-shaping EQ, saturation, reverb and delay are optional and depend on your vocal recording and the song.

The chain is non-destructive. Disable any effect with the power button on its header, reorder by dragging, or remove and replace without affecting the underlying recording. Build the full chain first, then bypass individual effects to test whether the vocal sounds better with or without each one. The bypass test is the simplest way to discover which effects are pulling weight.
Common vocal chain order mistakes
Here's a few things to remember, especially for beginners:
This chain is not an obligatory checklist. Not every vocal recording will need each single of these effects. What is important to remember is the general order. Some of them may be redundant in the context of your mix, depending on your vocal recording, music genre, etc. Listen first; add only what's missing.
Don't put reverb or delay early in the chain. Time-based effects spread the signal across time. Anything downstream processes that spread signal — including compression, which then reacts to the reverb tail and pumps the vocal.
Place compressor early in the chain. A late compressor reacts to the wet, processed signal rather than the dry vocal and may produce exagerrated reverb or delay repeats.
Use cleanup EQ before tone-shaping EQ. Tone-shaping EQ is optional, but should always come after you have removed unwanted frequencies from your recording with a cleanup EQ.
Don't apply vocal fx only in solo. Settings that sound right on an isolated vocal track may often sound wrong in context. Un-solo the vocal track and listen in context after adjusting each effect.
FAQ
A vocal chain is a sequence of audio effects applied to a vocal track in order. The signal flows through each effect in turn — typically EQ, compression, de-essing, saturation, delay, and reverb — with each effect transforming the signal before passing it to the next. The chain's purpose is to make a raw vocal sit cleanly and musically in a finished mix.
The standard order is: cleanup EQ → compression → de-essing → tone-shaping EQ → saturation → delay → reverb → limiter. Subtractive EQ comes first to clean the signal, dynamic control (compression) comes early to even out volume, tone shaping (EQ, saturation) happens after problematic frequencies are removed and dynamics are evened out, and time-based effects (reverb, delay) come last.
Cleanup EQ comes before compression so the compressor reacts to a clean signal rather than wrestling with muddy frequencies. Tone-shaping EQ comes after compression so it lifts presence on a controlled signal. Most professional vocal chains use multiple EQ instances at different positions for this reason.
A dedicated de-esser is helpful but not required. The same job — taming harsh sibilance in the 5–10 kHz range — can be done with a narrow EQ cut. Loop the part of the performance with a very prominent sibilance (harsh shounding 's'), add an equalizer with a very narrow Q, and sweep it around 5–10 kHz. Find the most resonating spot and cut it by 3-6 dB.
Amped Studio doesn't include real-time pitch correction in the effects chain. For full retuning, handle pitch before the chain using an autotune plugin. For one-off mistakes — like a single flat note in an otherwise solid take — cut the audio around the problem syllable in the Audio Editor and use the Pitch Editor to nudge that segment's pitch up or down.
Start creating beats and songs in minutes. No experience needed — it's that easy.
Get started