Drum programming
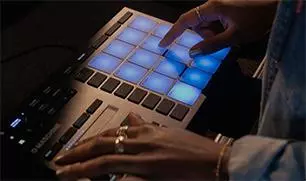
Mastering drum programming skills is a key element in any music producer’s skill set. The practice began with the advent of the first drum machines in the 1980s, which quickly gained popularity, replacing live drummers and expanding the use of drums in music production.
Today, with modern music so dependent on rhythm, the ability to program drums effectively can make all the difference to a music producer’s success. People instinctively feel a good rhythm, without even realizing it at the conscious level. Even without music knowledge, you will recognize a song with quality drum programming.
Professional drum programmers emphasize the importance of attention to detail. A conventional drum pattern such as four to the floor using standard 808 patterns may sound corny. But supplementing it with unique samples, syncopation, effects and other elements will bring novelty to it and interest the listener.
Join us as we explore the intricacies of drum programming and learn how to apply professional techniques to your projects. It’s worth noting that drum programming is different from synthesis: it doesn’t always involve creating samples or sounds from scratch, although many producers incorporate drum synthesis into their workflow. The main task is to create and manipulate drum patterns, creating permutations, loops and variations from them.
The Importance of Excellent Drum Programming
It’s hard to explain exactly why one drum loop gives us a particular sense of connection over another, but the closest word to describe this feeling is groove. Groove is necessary for music, because without it it is difficult to get into the rhythm of dance and movement.
For almost every track you make, the groove is the basis, except when it comes to some unusual, ambient or experimental work. Most likely, your goal is to make people dance and encourage their movements while listening to your tracks.
Luckily, there’s no one right way to find that groove, and there are many different approaches, whether you’re working on a 100BPM hip-hop track or a 175BPM drum and bass track.
Drum Programming Basics
To understand how a groove works, it’s important to start by learning the basics of drum programming. By analyzing and breaking down successful grooves, you can achieve significant success. As I already mentioned, drums are the foundation of almost all modern music. The producer needs to learn how to create this foundation before moving on to the more complex aspects of drum programming.
With that backdrop, let’s take a closer look at the different elements of a typical drum groove and how these components can interact to form the rhythmic framework of a track.
Kiсk
The kick drum, or kick, often serves as the basis for most drum grooves. In genres ranging from rock to hip-hop to house, the kick drum is the element that holds our attention and connects us to the rhythm of the composition. I like to think of the kick as the most powerful and impactful element in a drum kit.
When programming drum parts, I like to keep the kick more strictly within the rhythmic grid than other drum elements. The kick greatly influences the sonic characteristics of a track, including its genre and stylistic characteristics.
Backbeat
One of the first elements a producer usually adds to a kick drum loop is a backbeat. The backbeat, also known as the two and four beats in a drum rhythm, is usually performed using a snare drum or clap. This element serves as an important form of syncopation, adding drive and energy that helps define the groove of the drum pattern. Later we’ll also look at how backbeats can be manipulated to give them a more natural sound.
Dishes
Cymbals occupy the upper register of the traditional percussion instrument set. Using sixteenth notes or asynchronous patterns on the hi-hat can add extra energy to the overall drum pattern, while crash cymbals and other types of cymbals help highlight different parts of the track and enhance its dynamics.
I like to include other high-frequency rhythmic instruments in this category, such as the tambourine and shaker. These additional percussion instruments can be used to add swing and textural nuances to standard grooves.
Percussion sounds
Besides shakers and tambourines, there are many other percussion instruments that can add syncopated accents, create layers, and add unique textural elements to your drum patterns. The beauty of percussion in the context of drum programming is the wide range of possibilities for sample selection and placement.
The range of percussion instruments is huge: from bongos to triangles, from wood blocks to marimba and much more. The key here is to select high quality samples that fit together harmoniously, add dynamics and fit naturally into the overall groove.
Consider using loops
If you’re new to music production or just reading this article, you may have encountered some negative perceptions about using loops in music production. However, sampled loops can be a valuable tool for adding complexity and livening up your drum programming.
I also believe that sampled loops can be especially useful for teaching audio and MIDI combinations. Even if you don’t plan to include them in the final mix, a well-chosen loop can inspire creativity and speed up the music production process.
By not using loops because of their undeserved bad reputation, you are depriving yourself of an important tool in your workflow and creating unnecessary obstacles.
Going beyond the conventional
Once you have mastered the basic skills of drum programming, you can begin to master the more advanced aspects of the art. Introducing syncopation, unique rhythmic patterns, and subtle nuances can take your drum groove to the next level.
Starting with classic drum patterns is definitely helpful, but over time you’ll probably want to explore more unconventional drum programming methods. This will help your tracks stand out and have their own unique place among the rest of the music.
Syncopation
Syncopation is something that can be very useful for you when studying a topic more deeply. For the purposes of this article, I’d like to give a brief overview of syncopation and how it can expand your creative horizons and encourage you to approach music from an unconventional perspective.
Backbeat
Syncopation with accents on the second and fourth beats became popular around the last century. This style is so ingrained in modern music that it is difficult to imagine that it was not once a leader in syncopation. In syncopation, the emphasis is usually on the “two and four” beats, as opposed to the traditional “one and three” beats.
By experimenting with a standard backbeat, you can add dynamics, amplitude, or any other characteristic needed to achieve the desired atmospheric effect.
Offbeat
Off-beat syncopation is used to emphasize a rhythm that is outside the normal downbeat pattern. Cymbals and other percussive elements are often used to create off-beat syncopation. If you listen to most house tracks, you’ll notice some off-beat syncopation in the hi-hats. These hi-hats are usually located on the “i” in the 1-2-3-4 count – between 1 and 2, 3 and 4.
Suspension
Suspensive syncopation can create noticeable emphasis by dragging out or prolonging an element from the previous measure into the next. This type of syncopation is unique in that it violates conventional ideas of rhythm, creating a cascading effect. This links the bars together and gives the musical composition greater flexibility and fluidity.
Missed hit
This type of syncopation is one of my favorites because it puts emphasis in unexpected places. Using skipping syncopation, you can create unusual and original drum grooves that lead the listener to expect drum or percussion hits that either don’t come or come slightly earlier than expected.
This is especially noticeable in trap music, where producers often place kick drums in unexpected places, thus creating a sense of anticipation or tension.
Drum envelopes
One of the key but often overlooked aspects of drum programming is the rests between hits. The concepts of space and silence play an important role in music and must be carefully considered when creating musical works.
Consider that without effective use of EQ and compression, most mixes will not sound harmonious. Likewise, most drum grooves will not reach their full potential without careful tuning of the envelopes.
For example, long percussive elements in a fast groove can create a feeling of slowness or distance. A long drum sample in a 160BPM track can feel slow.
With modern sampler-equipped DAWs, the ADSR envelopes of samples can be manipulated to create tighter or looser grooves, providing much-needed space in drum arrangements.
In a fast track, you can shorten the duration of the drums to avoid them overlap with other samples. In a slow track, on the other hand, you can increase the duration of the kick to fill the void between the main hits.
This will not only improve the density and confidence of your grooves, but will also create more space for different samples to fit without them overlapping each other.
Melodic percussion
Many drum producers don’t pay enough attention to melodic percussion, even though it can play a key role in creating unique melodic hooks without relying on traditional melodic instruments such as synthesizers, keyboards or guitars.
Using melodic percussion instruments to create a melodic hook in a song can add a unique and engaging layer to your groove. There are several approaches that I often use in my compositions, but the key is to find percussion instruments with a distinct tonality.
Numerous percussion instruments, such as steel drums and marimbas, have a distinct tonality that allows them to be shaped into melodies. It’s important to have these melodic drums tuned to suit your track so you can use them to create simple melodies and riffs.
Even if you don’t use melodic percussion instruments to create melodies on their own, they can be used to create responsive rhythm patterns, interacting with specific melodies or phrases in your track, or serve as layers for leads such as vocals or synth melodies, enhancing the overall energy compositions.
Percussion instruments are especially effective in genres such as techno and house. In styles that focus on dance rhythms, melodic percussion instruments can offer a more sophisticated way of creating melodies.
Be a drummer
One of the key but simple principles of programming realistic drums is to think like a real drummer. While it can be fun to experiment with unusual and extravagant rhythms, to achieve realism you need to make sure that your drums and percussion parts can be performed by a live drummer.
Programming drum parts that are beyond human capabilities may inadvertently reveal the use of the software. For example, few real drummers will be able to perform a 64-note groove on a hi-hat at 150BPM, while a simple four-on-the-floor rhythm at the same tempo is perfectly feasible.
To better understand what a real drummer can and cannot play, it helps to listen to live performances. Listen carefully to a few of your favorite tracks, paying attention to the drum rhythms used, to get an idea of what is considered realistic in drumming.
Using a MIDI Instrument
When programming drums that sound at the same volume and are perfectly timed, it becomes clear that software has been used. One way to make the sound more realistic is to use MIDI instruments. You may not have access to live drum recordings, but you can use an electronic drum kit connected to the program to play the drums in real time.
I often prefer this approach when working with Addictive Drums 2, as it provides realism without having to go into complex settings. If you’re not a drummer, you can use a MIDI keyboard or drum pad.
Regardless of the hardware you’re using, creating drum patterns using MIDI will help your track sound much more realistic due to the variability of timing and dynamics. However, even without MIDI instruments, similar results can be achieved, although it may require more time and effort.
Don’t go crazy with quantization
Any experienced drummer will tell you that the key to drumming is tempo control. But even the best drummers aren’t perfect, and when recording live drumming, you’ll notice that some beats deviate slightly from the rhythmic grid in your DAW. This slight fluctuation in tempo is what gives the rhythm its realism.
Most modern DAWs offer the ability to quantize MIDI notes, locking them into a rhythmic grid. Quantization allows you to correct inaccuracies in tempo by tying notes to a grid.
While quantization can help enhance the groove, overusing it can give tracks an artificial, mechanical sound. When programming manually, it is better to leave some notes slightly offset from the grid so that they sound more natural. You can start by quantizing the entire drum pattern to fix its position, and then manually adjust the notes so they are slightly ahead or behind the beat.
The decision of whether beats should be placed before or after the count depends on the nature of the track. For a more dynamic sound, you can place the hi-hats slightly in front of the grid, or for a more relaxed sound, place them slightly behind.
Many DAWs offer varying levels of quantization, allowing producers to choose the degree to which notes are locked to the grid. Lower quantization levels make grooves more natural, while higher quantization levels lock elements tightly into the rhythmic grid.
Speed adjustment
Another key element to making drum parts sound more realistic is adjusting the speed of the beat. The MIDI note velocity determines the volume at which the sample is triggered. A note played at a high speed will sound louder and more energetic, while a note played at a low speed will sound softer and quieter.
You can emphasize certain beats in your grooves by varying the speed of the notes. This is similar to the approach of a drummer who emphasizes the most significant hits by playing them harder. For example, in a standard punk rock groove the emphasis is often on the second and fourth beats of each bar, whereas in a one-beat reggae groove the emphasis is usually on the first beat.
When adjusting note speeds, it’s worth thinking about how you would play the groove in real life. It can be helpful to record yourself tapping out a rhythm to see which beats you intuitively emphasize. You can then adjust the speed in your MIDI groove accordingly, based on the features you notice in your recording.
Humanization
Many DAWs come equipped with “humanization” features that make subtle adjustments to the timing and speed of notes. This “humanity” feature can be very effective in making MIDI grooves sound more natural without sounding robotic.
However, you must be careful when using the humanize function, as the most accurate way to determine accented notes is through intuition. It can be difficult for a computer to accurately detect changes in speed and timing based on feel, and accidentally applying these subtle nuances can make your MIDI drums sound less convincing.
Use real loops
A simple and effective way to add more realism to your MIDI drums is to use pre-made loops. I often find that combining programmed MIDI drums with live loops offers a great balance between control and realism.
Using virtual drum instruments like Addictive Drums 2 or Steven Slate Drums, which offer built-in MIDI grooves, you can start with these ready-made MIDI loops as the basis for your grooves. These MIDI grooves were recorded by real drummers, ensuring the perfect tempo and speed characteristics are already tuned.
You can then use individual patterns from these pre-made MIDI loops in other projects, applying them to different instruments. For example, a drum pattern from a MIDI track can be used to trigger other samples, such as the sound of a hoop or clap.
It’s also possible to combine your MIDI notes with live samples to create a unique layer in your drum groove. It can often be difficult to program realistic hi-hats, and this is where using live samples can be especially helpful.
Use your own reverb
Many professional drum programming programs come with a reverb function. While applying reverb can be effective on its own, I’ve found that using a variety of reverbs from different drum programs at the same time can result in inconsistent sounds. So I usually turn off the built-in reverb, preferring to use a single reverb for the entire mix.
After programming the entire drum groove, I route each element towards this single reverb to varying degrees. The goal is to make it appear as if all the elements were recorded in the same room.
You can then adjust various parameters of this room reverb to ensure it fits harmoniously with the rest of the mix, including size, style, EQ, and other settings.
Add saturation
When programming drum sounds in a VST, it is sometimes useful to add a saturation effect to prevent the sound from sounding too “clean”. Saturation is one of my favorite effects as it adds natural artifacts to the sound that are typical of a live recording.
While it’s possible to simply apply a saturation plugin, such as a tape emulator, directly to a drum section, I’ve found that parallel saturation provides more control and allows the right amount of dirt to be precisely dosed so that the drums effectively cut through the mix.
To do this, send the drum group to an auxiliary track with a saturation plugin. Listen to the drum sounds while gradually increasing the saturation level on the plugin. The advantage of parallel saturation is that you can make the saturation auxiliary track as dirty as is appropriate, since the main goal is to only slightly improve the sound of the main drum group.
Determine what your drum set is missing and consider using saturation to improve the sound. Do your drums sound too thin? Then you can increase saturation at low and mid frequencies. Or perhaps the sound is too dark? In this case, increasing the high frequencies will help achieve a brighter and clearer sound.
After selecting the appropriate tone, turn the auxiliary track level down to minimum and slowly increase it until you achieve the optimal combination of clean and dirty sound.
Adding fills
Once you have a decent groove running through the different parts of the song (verses, bridges, choruses, etc.), it’s worth considering adding fills to tie those sections together. I often like to insert fills every eight bars or so to vary the rhythmic pattern of the drum groove and break up long sections or transition to the next part of the song.
Programming simple fills into a groove is usually not difficult. If you’re working with VST drums, you’ll likely find a library of pre-made fills with a variety of patterns to choose from.
In order for a fill to fit harmoniously into an existing pattern, it is important to make sure that it does not conflict with elements of the main groove. For example, if you are adding a fill with a snare, you might want to remove the snare from the main pattern to make room for the fill. At the same time, keeping other elements, such as shakers or hi-hats, can help create a more cohesive and cohesive sound.
Once the fill is placed in the right place, you need to fit it correctly into the mix, paying special attention to matching the speed of its elements with the speed of the main pattern. It is important that the fill does not sound too loud or intense compared to the main groove.
Finally, apply quantization or adjust the timing of the fill elements to match the overall drum groove. For example, if the main groove has a swing, then the fill elements can be moved so that they are slightly behind the grid, maintaining the overall rhythm.
Finding the best drum samples
Even if you’ve masterfully programmed your drum grooves and carefully set up your drum VST parameters, using the wrong samples can leave your mixes flat. Finding quality samples to use in your tracks is a critical aspect to consider.
There are many great samples and kits available today that sound great on their own. But even if a sample sounds perfect alone, that doesn’t guarantee it will sound effective in the context of your mix, especially when combined with other sounds. While mixing tools such as EQ, compression, and envelope shaping can help with imperfect samples, they are limited in their capabilities.
Trying to mix incompatible samples can add extra work and cause complications. It’s important that your drum loops and samples sound like they were made for each other from the start. Continuity and harmony of sound are extremely important in maintaining the listener’s attention.
While it can be tempting to pick the first sample that comes along, taking the time to find the perfect sounds will prove invaluable in the process of mixing and mastering your tracks.
Drum tuning
Technically, drums are inharmonic instruments, meaning that their overtones do not follow a specific musical key. However, most drums have a fundamental tone that produces these inharmonic overtones.
Interestingly, there are no clearly defined rules in the process of tuning drum samples, which makes it open to experimentation. However, you can often notice if the sample tuning doesn’t fit with the rest of the drum groove.
The key element to tune is the kick drum, as an improperly tuned kick can conflict with the bass and other low-frequency elements, causing disharmony in the mix. This is especially important in genres like trap and hip-hop, where tracks often rely on 808 bass. In genres with shorter kicks, it can be more difficult to determine the specific tone of the kick drum.
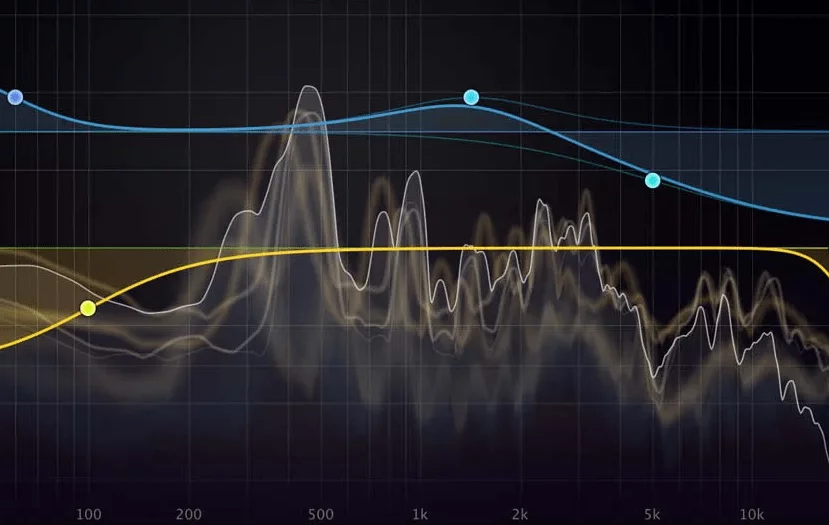
If you have difficulty determining the fundamental tone of a drum, you can use a spectrum analyzer. In addition to maintaining tonality, tuning the drums can change the overall feel of the sound. For example, lowering the pitch of a drum can make it sound darker and softer, while raising the pitch will make it sound brighter and more energetic.
Experiment with tuning and transposing your drums to see how they fit into the overall context of your compositions.
Going beyond genre
Using samples from atypical sets can add a unique contrast to your grooves. For example, soft and delicate samples without harsh attacks can add texture and lightness to the heavy drums of dubstep.
You can also use a live hi-hat in a techno groove to give it a natural feel, or add a digital kick over a live drum groove for a more powerful effect.
Often, unexpected samples that don’t belong to a specific genre can make programmed drums more interesting. Even if you’re working on a rock piece, feel free to experiment with aggressive snare samples from the bass music kits of the future.
Arrangement
Organize the drum elements in your track so that the energy gradually builds from start to finish. While it’s possible to put 20 different drum elements together to create a powerful groove in a hook, it’s not necessary to use the same full set of elements in every hook of a song.
Instead, you should aim for a gradual build-up, adding or introducing new elements in each section to achieve maximum energy in the final hook, chorus or drop. For example, an energetic shaker can be saved for use in the very last chorus, emphasizing its climax.


