Mastering chain
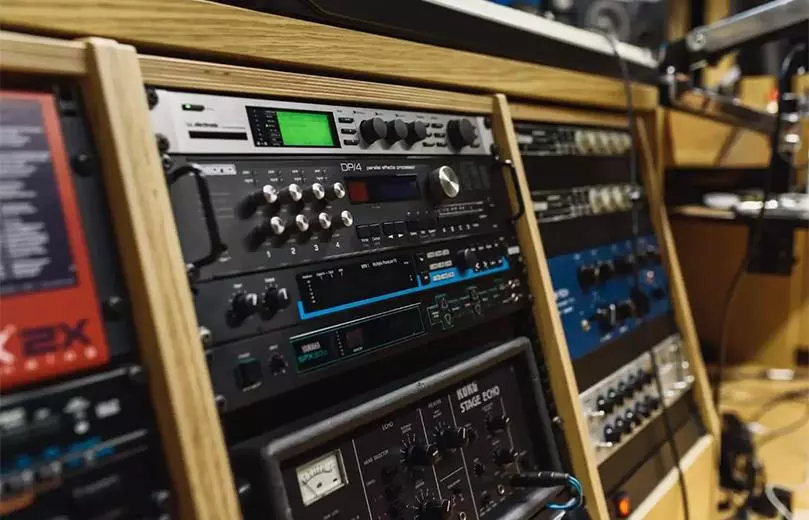
Mastering is a critical step in creating professional audio. This is the final step in the audio production process, allowing audio engineers to finalize tracks before releasing them to radio.
Many beginners find it difficult to create their first mastering chain. Fortunately, however, the mastering process is not as difficult as it may seem; it just requires some key tools and a lot of practice. In this guide, we’ll take a closer look at the basic steps of mastering to help you make your mixes truly impressive.
Online beatmaker Amped Studio is the only application of its kind that supports VST technology, so here you can put together your own set of mastering plugins and leave it as a ready-made project for finalizing your mix in the future.
What is mastering?
To effectively refine your music tracks, a deep understanding of the mastering process is essential. Mastering aims to give your track a final polish, making it sound more harmonious and playable in a variety of environments, be it radio or listening venues. The audio engineer uses tools such as stereo balancing, multi-band compression and dynamic equalization to make subtle but significant adjustments that will help the track sound perfect on a variety of audio devices.
Mastering is a process that focuses more on the technical aspects, as opposed to mixing where creativity plays a paramount role. The mastering engineer uses specialized processing to finalize the sound, which has been carefully balanced during mixing. A well-mixed track usually has an even frequency distribution and sounds convincing on streaming platforms, in-car systems, club setups, etc.
What is a mastering signal chain?
Even if you prefer to let a professional mastering engineer or specialized software like Emastered finalize your music tracks, it’s helpful to understand the basics of the process. This will give you more control over the final sound of your mix. The mastering signal chain is nothing more than the sequence of application of mastering plugins during a processing session. Although the order may vary between specialists, standard types of plugins are generally used to achieve the desired result.
How to Build a Mastering Signal Chain: Step-by-Step Guide
Are you ready to create your own mastering chain? Grab your mastering plugins and get to work!
- Gain setting;
- Cleaning the equalizer;
- Multi-band and adhesive compression;
- Strengthening the tone;
- Stereo image;
- Limitation;
- Dosing.
1. Make sure you have a good base for the signal chain with gain staging
Before you start incorporating plugins into your mastering chain, it’s critical to pay attention to volume control. This process may seem complicated, but the essence is to control the audio output levels to prevent distortion that can ruin the audio quality. Your mix should remain clean, without clipping or distortion, which means the maximum amplitude should not exceed 0 dB.
It is important to remember that mastering involves more intensive use of compression and limiting, so it is necessary to ensure sufficient “volume headroom”. Ideally, your track’s volume levels will be between -18 and -3 dB before mastering. Without preliminary preparation and avoiding overload, it is impossible to achieve high-quality mastering. If you are having difficulty interpreting the level gauges, use the volume control plugin on the master channel to determine which frequencies need correction.
It is also valuable for mastering engineers to receive reference tracks from artists or producers, allowing them to compare and fine-tune masterings to specified standards. Quality mastering is one that takes into account the unique requirements of each track, rather than mechanically following the same settings and chain of plugins.
2. Cleaning the equalizer
When including an equalizer in the mastering circuit, although the choice of its position is left to the discretion of the sound engineer, the main task of the equalizer is to achieve the ideal balance of tonality. Using an equalizer should help harmonize the frequency spectrum of your mix, while maintaining its energy and dynamics.
Adjustments should be minimal; if more than 3 dB of adjustment is required in the highs, mids, or lows, this may indicate problems in the mix. It’s best to eliminate unwanted frequencies during the mixing stage, as mastering is designed to enhance and highlight the already existing qualities of a track, not to correct them.
You may need to use multiple equalizers on the master bus. For example, a harmonic distortion plugin may improve the sound in one range but cause problems in another. In this case, the equalizer can be used after the harmonic distortion plug-in for correction, even if another equalizer has already been applied before.
There are no strict rules in mastering, only guidelines that should be adapted to each specific track.
There are no strict rules in mastering, only guidelines that should be adapted to each specific track.
3. Multi-band and adhesive compression
Mastering tracks is closely related to the use of various types of compression. Ranging from dynamic parallel to glue compression and compression that creates subtle harmonic distortion, these techniques can soften the brightest moments and emphasize quiet passages, giving the track a uniform and spacious sound.
Selecting compression settings plays a key role in achieving stable and dynamic sound. A variety of compressors provide opportunities to enhance your sound: a glue compressor can strengthen the connections between elements of a mix, or a multi-band compressor can highlight desired frequency ranges. Considering that streaming services use their own compression to unify the sound, it is worth adapting your tracks to these conditions for optimal playback.
4. Enhance Tonality
The mastering arsenal includes compressors that bring the warmth of tube sound into the mix, enrich it with color, or imitate the richness of tape recordings. These tools open up space for creativity, allowing you to emphasize the merits of the composition. However, their use requires moderation so as not to disturb the harmony of the overall sound. While introducing harmonic distortion isn’t always necessary, experienced mastering engineers can subtly add this flavor when it comes to highlighting the character of a track.
5. Stereo image
Although using a plug-in to enhance the stereo effect is not mandatory, many mastering engineers use it to enhance the sense of spatiality of the sound. Increasing the stereo width can give a composition more involvement and volume, but care must be taken not to cause phase distortion. A correlation meter will be an indispensable tool for identifying and eliminating such problems.
In certain cases, engineers choose to narrow the stereo field to achieve a unique sound effect for a track. In any case, it is extremely important to perform a mono compatibility check to ensure that there are no phase conflicts before finalizing the master file.
6. Limitation
The final stage of mastering is the application of a limiter, which can be considered an extreme form of compression. Experienced mastering engineers recognize that these powerful tools require careful and moderate use. The goal of limiting is usually to reduce the volume by 2-3 dB, but given the variety of music genres, it is necessary to know and meet their specific standards. As a result, the track should maintain its dynamics and sound more refined, which is reminiscent of the working principles used in compression.
7. Dosing
The final stage of mastering requires careful testing of the master recording to ensure compliance with audio standards that ensure high-quality playback. Your track should be at a volume level between -16 and -20 LUFS. Use peak meters to ensure that the track will not distort on analog devices compared to digital ones. Checking the correlation meters is also important: if the readings are leaning towards -1 more than +1, you will need to address the issues.
It is necessary to test the master through various outputs to identify any sonic defects. Once this process is complete, you can consider mastering complete.
It is important to remember that the ideal mastering must meet the unique requirements of each composition. There is no one-size-fits-all approach to processing, as every music mix is unique. Strive to create a harmonious balance and enhance each track during the mastering process.
Mastering FAQs
If you’re still having trouble learning how to build a mastering chain, here’s a short list of frequently asked questions with answers to help you better understand the process.
What should be in the mastering chain?
Just like mixing, mastering is a process that can vary greatly depending on personal preference. A typical mastering chain uses various groups of plugins, including compressors, equalizers, limiters, as well as stereo effects tools and other specialized plugins such as exciters. However, in addition to choosing plugins, it is also critical to determine their optimal order in the processing chain.
Where is the exciter located in the mastering circuit?
The placement of creative tools such as exciters in the audio processing chain is a matter of personal preference for the audio engineer. They are often placed at the end of the information chain, although they are not strictly required. It’s important to remember that exciters can be applied to individual tracks during the mixing process, or to the overall mix.
Which is better – compression or equalizer?
The choice between compression and equalization depends on many factors and the preferences of the sound engineer. In some cases, it may be beneficial to start with a subtractive EQ to reduce the severity of unwanted frequencies before compressing them. This helps avoid them becoming stronger in the process. At the same time, equalizers can be effectively used both before and after compression, depending on the specific tasks and goals of the mix.
Where do you install the chain limiter?
Limiting is the final stage in the mastering process. This tool can be compared to a high-power compressor, and its use requires care to ensure that the mix is boosted without losing its dynamic range. Controlling volume levels is also critical for correctly preparing a track for distribution via streaming services.
When should a pathogen be used?
An exciter is a specialized plugin that introduces subtle harmonic distortion into an audio mix, emphasizing certain frequency ranges. Although its use in the mastering chain is not necessary, its use before equalization can be useful in correcting unwanted frequencies that the exciter may highlight.
What plugins should you use for mastering?
The choice of plugins for mastering depends on the individual preferences of the sound engineer. However, usually the arsenal includes tools such as compressors, equalizers, possibly saturators, devices for increasing stereo width and limiters. Basic versions of these plugins are often offered for free on most popular digital audio workstations (DAWs).
The quality of mastering is determined not only by the plugins used, but also by the skill of the engineer. We hope that our guide will help you create high-quality sound for your tracks and be useful in your musical creativity. We wish you success in mastering!


