
Producing music for beginners

Everyone starts somewhere — and the first step is figuring out what you actually want to do. Maybe you’re into making beats, maybe you want to build full tracks from scratch, or maybe your focus is mixing and mastering. That choice sets the direction for everything that follows.
Once that’s clear, it’s time to learn the basics. Understand how a track comes together, how rhythm and melody interact, and why balance between elements matters. You won’t get far without it. One of the best ways to learn is by really listening to music — not casually, but with purpose. Break things down and figure out what makes them work.
Forget the idea that you need a fancy studio to make good music. You can get going with just a mic, an audio interface, a solid pair of headphones, and some basic production software. Everything else comes with time and practice.
What Music Production Really Means
Music production is the full journey of making a track — from the first idea to the final sound. It covers writing the music, shaping the arrangement, recording, mixing, and getting the track ready for release. Each part of the process takes focus and a bit of technical know-how. But more than gear, what really matters is sticking with it, learning as you go, and finishing what you start.
Fundamentals of Music Production
What a Music Producer Really Does
Music production isn’t just about the technical side — it’s about overseeing the entire process of creating a track from start to finish. A producer is the person who keeps the big picture in focus, guiding a project from the first spark of an idea to the final version ready for release. Depending on the setup, they might write the music themselves, help shape an artist’s rough material, or coordinate a team of musicians and engineers to bring everything together.
One of the producer’s main responsibilities is making sure the track feels cohesive. That means paying attention to how different elements work together, building structure, and making sure the musical idea is fully realized. During recording, a producer might suggest changes to the arrangement, help the artist bring more emotion to a performance, or decide what needs to be simplified or highlighted to make the track stronger.
For independent producers, especially those working from home, the role often includes everything — writing, arranging, recording, mixing, and even mastering. And these days, you don’t need a big studio or expensive gear to get started. A laptop, audio interface, mic, and a few plugins can go a long way. But it’s important to remember: being a producer isn’t just about pressing buttons in a DAW. It’s about understanding energy, flow, balance, and how to shape sound in a way that connects with people. A good producer helps turn a collection of sounds into something that feels alive.
Developing Your Ear as a Music Producer
Working confidently with sound isn’t possible without a well-trained ear. A producer needs more than the ability to recognize pitch — they have to pick up on subtle details: how instruments interact, which frequencies are clashing, where the mix lacks depth, or where the stereo image feels off. This kind of awareness comes from consistent practice and intentional listening.
Ear training happens through experience. Don’t stick only to your favorite genres — explore a wide range of music. Pay attention to how arrangements are built, how clean individual parts sound, and how vocals sit in the mix. Comparing tracks is also helpful. One might sound clear and open, while another feels muddy or overly compressed. The goal is to figure out what creates those differences.
The more you practice, the better you get at spotting what’s not working. You start to hear when a guitar needs more space, when the bass overwhelms the mix, or when a vocal feels uneven in volume. These insights help you shape your sound more precisely and build mixes that feel balanced and intentional. A good ear isn’t something you’re born with — it’s something you develop through focused, consistent effort.
Learning the Basics of Songwriting
Clean production is important, but it’s the song itself that sets the mood and draws listeners in. That’s why a producer needs to understand more than just mixing — they need to know how to work with melody, harmony, and lyrics to create something memorable.
A good place to start is structure. Most songs follow a familiar format: verse, chorus, verse, chorus, bridge, final chorus. That kind of layout feels natural to the listener and helps build energy and flow. Structure gives the track direction and keeps it engaging from start to finish.
Harmony is the next piece. Even simple chord progressions can set the right tone if they’re chosen with intention. It’s not about complexity — it’s about creating the right emotional backdrop for your melody. A couple of well-placed chords can say more than something technically advanced but unfocused.
Lyrics matter just as much. They don’t need to be overly poetic, but they should feel alive. Good lyrics bring emotion, tell a story, or create a clear image. They should support the music and move with it, not fight against it. When the words and melody work together, the result is always stronger.
Everyone approaches songwriting differently — some start with a lyric idea, others with a melody. The key is to experiment. Write a lot, go back and listen, learn from each attempt. The more you practice, the better you’ll understand what makes a song connect — and how to shape that connection in your own work.
Developing a Producer’s Technical Skills
Learning Chords, Music Theory, and Rhythm
A solid grasp of music theory helps producers work more efficiently and confidently. It starts with the basics — chords, rhythmic patterns, and understanding timing grids. This foundation lets you build harmonic and rhythmic ideas without relying entirely on trial and error. Practicing common chord progressions, trying out different rhythms, and learning how to transition between shapes builds muscle memory and creative fluency. Working with MIDI controllers or drum pads sharpens your timing and precision — especially if you’re recording in real time. With consistent practice and some self-reflection, these skills start to show up naturally in your own tracks.
Recording Clean, High-Quality Sound
Great sound starts with a clean signal. That applies whether you’re recording vocals or live instruments. The quality of your recording depends on the mic you use, how you position it relative to the source, and the signal path you’ve set up in your session. Room acoustics are just as important — even with decent gear, things like reflections and background noise can ruin a take. Check the noise level in your space, deal with problem frequencies, and use some basic sound treatment if needed. Playing around with mic placement and trying different setups will help you figure out how to get the sound you’re after.
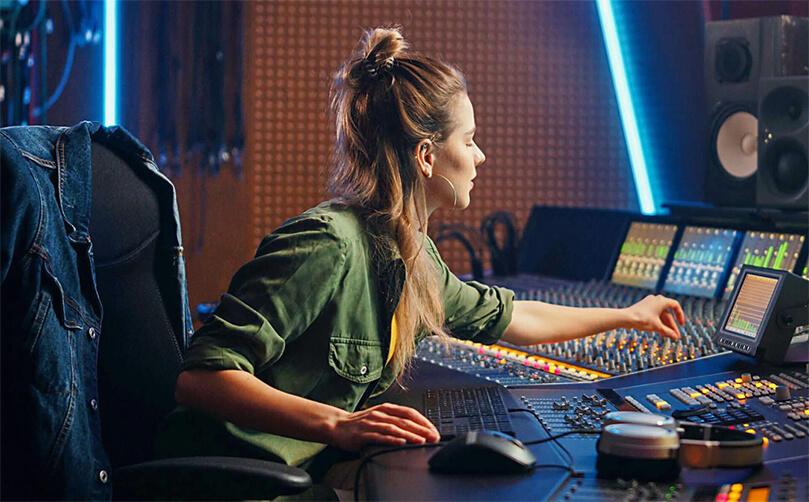
Mastering the Art of Mixing
Mixing is where everything comes together. This is where you shape the track into a cohesive, finished piece. A good mix means everything has its space — instruments don’t clash, vocals sit right, and nothing feels too heavy or too thin. The core of mixing involves balancing levels, EQ, compression, and effects. You’ll need to understand which frequencies are likely to compete, how to control dynamics, and where to use reverb or delay to add depth. Common problems at this stage include muddy low-end, weak stereo spread, or overly compressed elements. Mixing well takes practice — and a habit of listening critically and referencing other tracks.
Final Stage: Getting the Track Release-Ready with Mastering
Mastering is the last step before release. It’s where the final polish happens — adjusting loudness, dynamics, and making sure the track translates well across different devices and platforms. Tools like limiters, EQs, and stereo enhancers are used with precision to bring out the best in your mix. The goal is to make it sound consistent, balanced, and ready for public release. You can master your own tracks, but often it’s best to hand it off to someone else. A fresh set of ears and some outside perspective can catch things you might have missed and give your track that extra push.
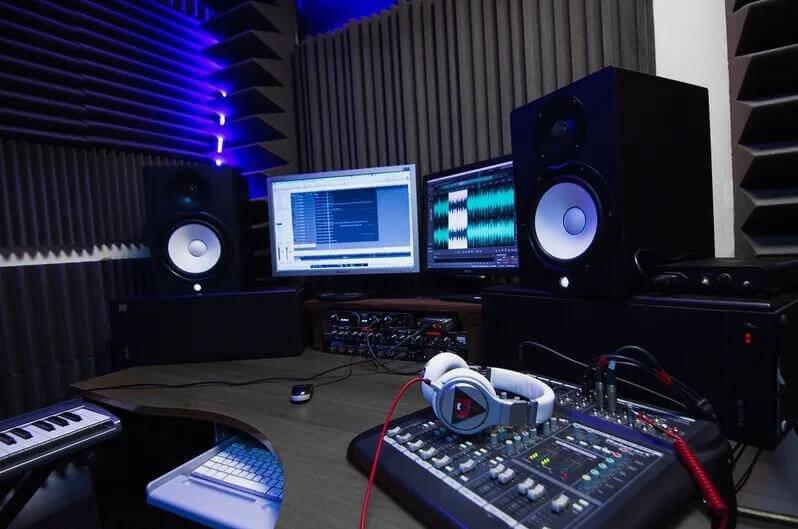
Essential Gear to Start Recording Music at Home
Computer
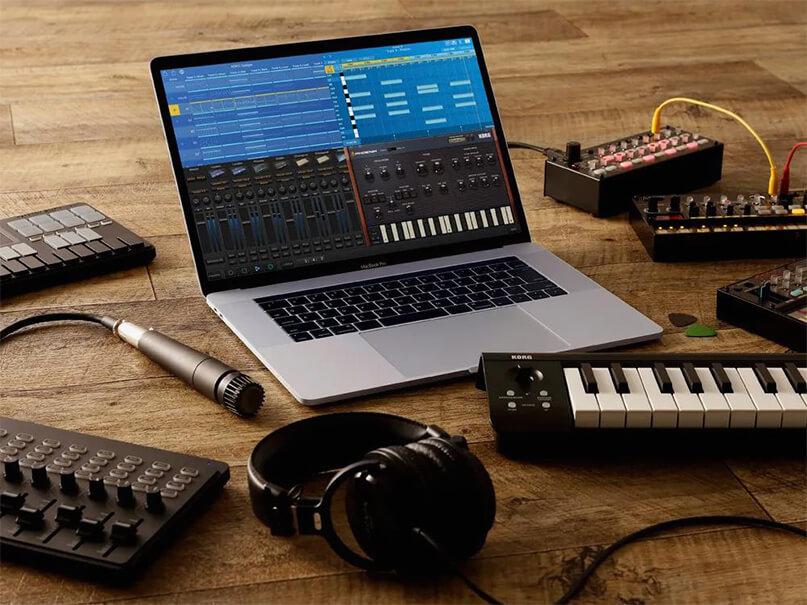
Your computer is the central hub of your home studio. Whether it’s a laptop or a desktop doesn’t matter as much as its ability to handle multiple audio tracks, plugins, and virtual instruments without slowing down. A strong CPU and enough RAM are key. Tablets and smartphones can be handy for jotting down quick ideas or sketching out arrangements on the go, but they won’t cut it for serious production work.
DAW
Your Digital Audio Workstation (DAW) is the software where your entire track comes together—from recording and arranging to mixing and mastering. There are plenty of options out there: Logic Pro is a great pick for Mac users, Ableton Live is popular among electronic producers, FL Studio is known for its user-friendly layout, Cubase is trusted for live instrument work, and Reaper is a powerful, lightweight option with tons of flexibility. Try out a few demo versions before settling on one—it’s all about what feels right for your workflow.
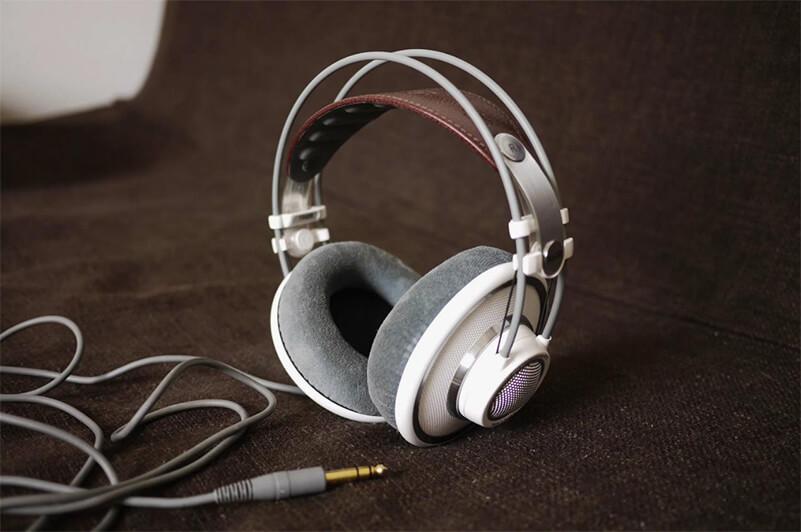
Monitors and Headphones
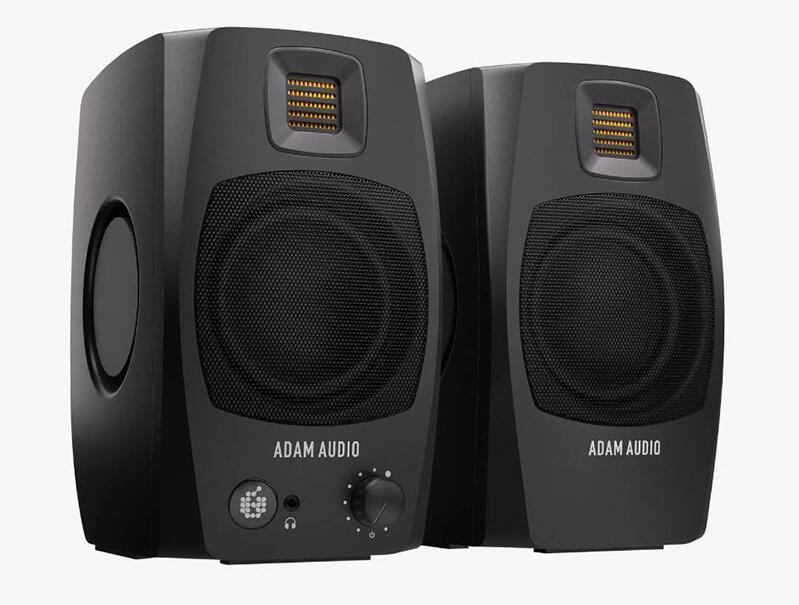
To really understand how your music sounds, you need accurate monitoring. This isn’t about loudness or “good” sound—it’s about hearing your track exactly as it is. Studio monitors (the speakers, not computer screens) are designed to deliver a flat, uncolored frequency response so you can mix with confidence. They don’t hype the bass or brighten the highs like consumer speakers do—and that’s a good thing.
But if your space doesn’t allow for speakers—maybe because of poor acoustics or thin walls—good headphones are a solid alternative. Closed-back headphones are great for recording (they won’t leak sound into the mic), while open-back or semi-open models are better suited for mixing. The key is to pick headphones made for studio use, not casual listening.
Upgrading Your Setup: Extra Gear Every Music Producer Eventually Needs
Starting out with just a computer, headphones, and a DAW is totally fine — that’s more than enough to get your first tracks recorded and start learning the ropes. But once you begin working with vocals, live instruments, or more complex sessions, you’ll quickly realize you need to expand your toolkit. That’s usually when an audio interface becomes essential.
Audio Interface
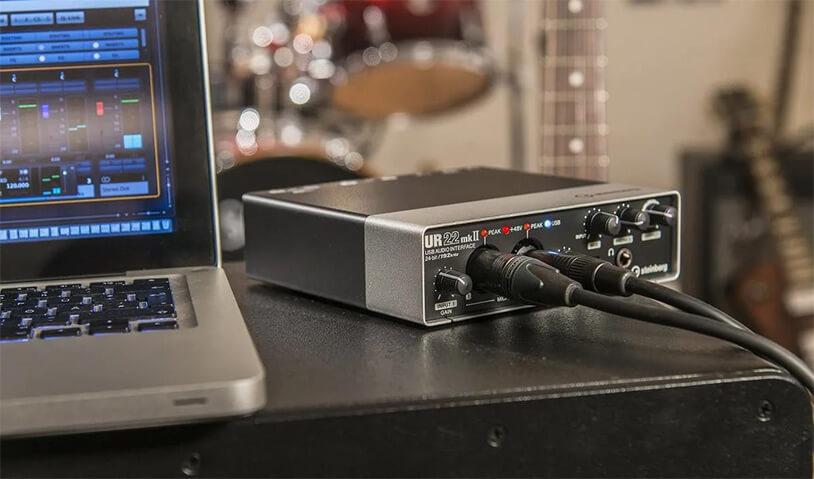
An audio interface acts as the bridge between your external gear and your DAW. It takes the analog signal from a mic, instrument, or synth, converts it into digital audio your computer can process, and sends the finished track back out to your headphones or monitors. Built-in sound cards on laptops aren’t designed for this kind of work — they often introduce unwanted noise, can’t capture enough detail, and just aren’t made for high-quality recording.
A good interface delivers clean, reliable audio with minimal latency — which is critical if you’re recording live. If there’s a noticeable delay between what you play or sing and what you hear in your headphones, it throws off your timing and makes it hard to perform.
When choosing an interface, you’ll want to pay attention to how many inputs it has. If you’re just tracking vocals and guitar, two channels will do. But if you’re recording drums, a full band, or multiple hardware synths, you’ll need four, eight, or even more inputs.
Choosing the Right Microphone for Your Home Studio
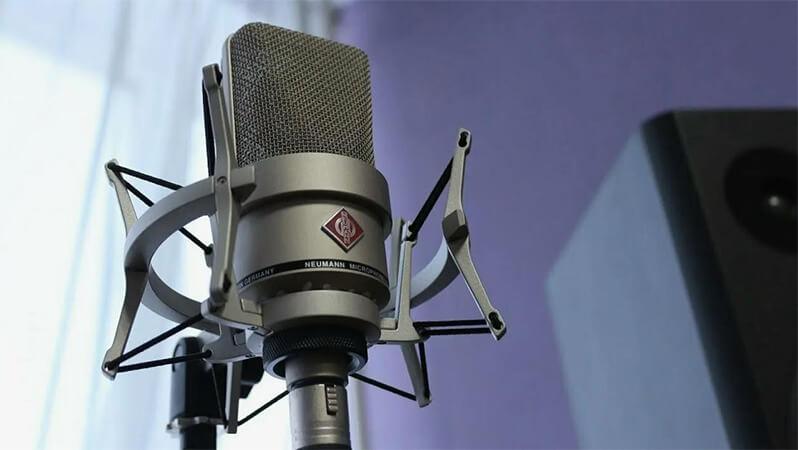
If you’re planning to record vocals, acoustic instruments, or any kind of live sound, a microphone is a must-have. It’s not just a piece of gear — it’s the starting point of your entire recording chain. And picking the right one for your setup can make a huge difference in sound quality.
The two most common types used in music production are dynamic and condenser microphones. Dynamic mics are less sensitive to background noise and are great for loud sources like guitar amps or drums. They’re durable and handle high sound pressure levels without distorting. Condenser mics, on the other hand, are more sensitive and pick up more detail and nuance. That makes them ideal for recording vocals, acoustic guitars, strings, or any performance where clarity and tone matter. Just keep in mind that condensers require phantom power (usually labeled +48V), which your audio interface or mixer typically provides.
Studio mics connect via XLR cables. While USB microphones do exist — and plug directly into your computer — they tend to be more limited in flexibility and overall audio quality. If you’re aiming for reliable results and room to grow, an XLR mic paired with a proper interface is the smarter choice.
You don’t need to spend a fortune right away. There are plenty of budget-friendly dynamic and condenser mics that deliver solid results for home studios. What matters most is knowing how you’ll use it. Are you mainly recording vocals? Do you want to capture instruments too? Will you be recording in a treated room, or just your regular bedroom?
MIDI Controllers in the Home Studio: What They Do and How to Choose One
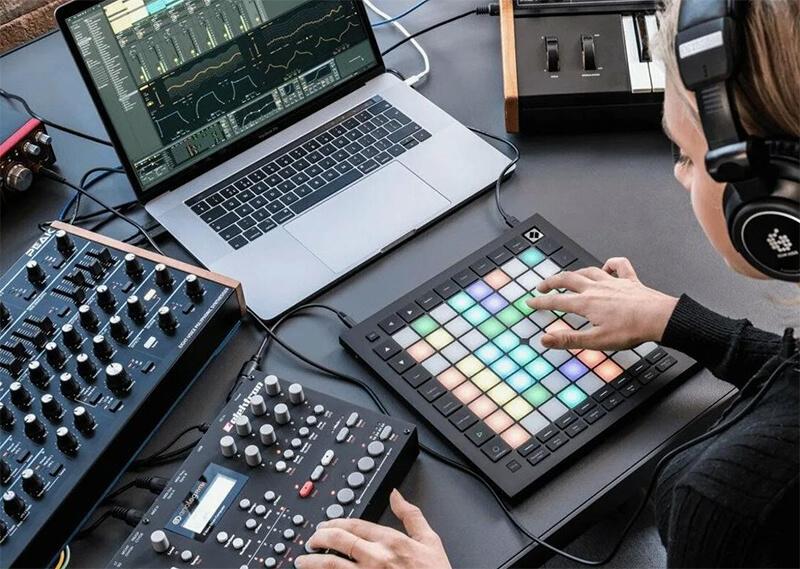
Computers are incredibly powerful tools for making music — they give you access to instruments, effects, and endless editing options. But when it comes to actually playing something in real time, using a mouse and keyboard can feel clunky. That’s where MIDI controllers come in, turning digital music production into a more hands-on, musical experience.
The most common type is the keyboard controller. It lets you play melodies, chords, and basslines just like you would on a traditional piano or synth. For drums and samples, pad controllers are a go-to option — they’re velocity-sensitive and great for triggering hits, loops, or phrases. Many controllers also feature faders, knobs, and buttons that can be mapped to your DAW, so you can adjust levels, tweak effects, or control synth parameters without touching your mouse.
It’s important to understand that a controller doesn’t produce sound on its own. Instead, it sends MIDI data to your computer — information about which notes you played, how hard you pressed them, and how long you held them. Your DAW then uses that data to trigger sounds from virtual instruments.
If you’re just getting started, a simple controller will do the job — as long as it works with your DAW and fits your workflow. The goal is to make it easier and faster to turn ideas into tracks. A good controller helps you feel like you’re actually playing music, not just programming it.
Virtual Instruments: A Practical Alternative to Real Gear
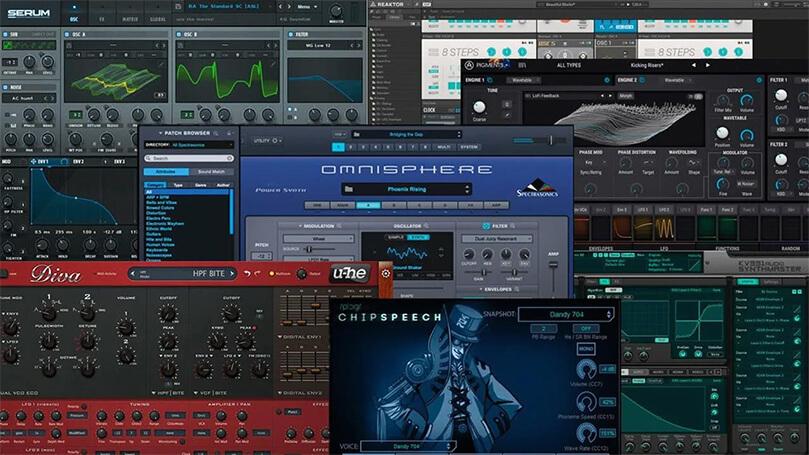
Even with a mic, audio interface, and MIDI controller, you still need something to generate actual sound. And if you don’t have access to live instruments or the space to record them, virtual instruments are an easy and powerful solution.
These are software-based versions of real-world instruments — everything from pianos and drums to complex synths and orchestral libraries. They run directly inside your DAW and can be played using a MIDI controller or programmed right into the sequencer. Most DAWs come bundled with a basic collection of virtual instruments, which is more than enough to start building tracks.
For home producers, this setup is especially convenient. No cables, no mics, no room treatment — just pick a sound, tweak the settings, and start recording. Some of these plugins emulate gear that would cost thousands of dollars to access in real life, and they do it with impressive realism.
Samples and Loops: A Creative Shortcut That Works
Plenty of iconic producers — DJ Shadow, The Avalanches, DJ Premier, Kanye West — have built entire tracks using samples. Their approach is based on reworking and reimagining existing audio to create something entirely new.
Sampling is a fast way to build a track, especially if you don’t have live recordings of your own. Loops let you lay down the rhythm, set the tone, and define the overall structure of your song. It’s an efficient way to get your ideas down and focus on the creative part of making music, rather than getting caught up in technical setup.
How a Track Comes Together: Key Stages of Music Creation
At the heart of every production is the song itself. It shapes the mood, controls the dynamics, and sets the direction for the entire track. Some producers start from scratch, writing as they go, while others work from an existing melody, chord progression, or vocal idea. Either way, understanding basic songwriting structure helps guide creative and technical decisions throughout the process.
Starting a New Session: Building Your Workspace
Before you do anything else, open a new project in your DAW. This will be your workspace — where you’ll record ideas, build arrangements, apply effects, and eventually mix the track. Getting organized from the beginning helps you stay focused and avoid technical headaches later on.
Tempo and Key: Setting the Foundation
One of the first things to lock in is the tempo. It defines the speed of your track and is essential for syncing up MIDI, loops, and live instruments. A steady tempo keeps everyone in time and makes editing a lot easier down the line.
Next comes the key. In the early stages, you don’t have to commit to one right away — especially if you’re sketching ideas. But as melodies and chords take shape, the key will naturally fall into place. And if you need to change it, it’s best to do that before you’re deep into production.
Audio Setup: Routing Your Sound Correctly
To make sure everything records and plays back smoothly, you’ll need to configure your audio settings in the DAW. If you’re working without an external audio interface, your computer’s built-in sound card will usually be selected by default — and in most cases, that’s fine for basic tasks.
If you’re using an audio interface, go into your DAW’s audio settings and set it as the main input and output device. Then, assign the correct inputs and outputs. For example, if your mic is plugged into input 1, create an audio track and set that input as the source. When you hit record, the signal will be routed to that track.
Your outputs — typically 1 and 2 — send audio from the DAW to your headphones or monitors. If everything is set up right, you should hear your session playback clearly the moment you press play.
As you progress, your routing setup might get more complex — with buses, subgroups, and parallel processing. But at the beginning, it’s enough to understand this simple path: from the mic to the track, and from the DAW to your ears.
Getting Started with Virtual Instruments: How They Work and What to Know
Virtual instruments let you produce music entirely inside your computer — no microphones, no external gear, no complicated setup required. All you need is a DAW and a MIDI controller. In fact, you can even get started with just a mouse and keyboard. Thanks to their flexibility and high-quality sound, virtual instruments have become a go-to solution for modern producers.
There are two main types of virtual instruments. Synths generate sound from scratch using algorithms and sound engines. They’re great for creating original tones and textures that don’t exist in the physical world. The other type is sample-based instruments. These are built on real audio recordings — sampled notes or sounds mapped across keys or pads. When you trigger a note, it plays back a pre-recorded sample, making it easy to recreate the sound of drums, guitars, vocals, or pretty much anything else.
Most virtual instruments come loaded with preset sounds. If you’re not sure where to start, just pick a preset and experiment — play a few notes, tweak the settings, and get a feel for what the instrument can do. It’s a quick way to understand its character and figure out how it might fit into your track.
Plugin Formats: What Works with Your Setup
Virtual instruments usually come in two main plugin formats: VSTi and AU. VSTi is widely supported on both Windows and macOS, while AU is designed specifically for macOS and used mainly in other Apple-based platforms.
Before you install anything, it’s worth checking that the format is compatible with your DAW and operating system. For example, Ableton Live works with VSTi on both Mac and PC, but Logic Pro only uses AU plugins. Making sure everything lines up ahead of time will save you from annoying compatibility issues later.
Buffer Size and Latency: How Settings Impact Your Workflow
When you’re working with virtual instruments and plugins, your computer’s processor can quickly get overloaded — especially if you’re running multiple tracks and effects at once. When the system starts to struggle, you’ll hear clicks, dropouts, or glitches in the audio. One of the simplest ways to ease the load is by adjusting the audio buffer size in your DAW settings.
A larger buffer gives your system more time to process sound, which results in more stable playback. But it also increases latency — the delay between when you play a note and when you actually hear it. A smaller buffer reduces that delay, making your instruments feel more responsive, but it puts more pressure on your CPU. The key is to find the right balance: smooth playback without making real-time performance feel laggy.
Using an external audio interface can help a lot here. Unlike built-in sound cards, interfaces use dedicated drivers that handle audio much more efficiently. This allows you to work with lower buffer settings and keep latency under control. If you’re planning to use virtual instruments seriously — especially for live playing or real-time recording — an audio interface is a smart investment.
Playing Virtual Instruments with a MIDI Controller
Virtual instruments can sound rich and expressive, but to bring out their full potential, you need proper control. Most DAWs let you use your computer keyboard to play basic notes — and that’s fine for sketching out ideas or working on the go. But those keys aren’t velocity-sensitive and can’t capture the dynamics of a real performance.
That’s where a MIDI controller comes in. Whether it’s a set of keys, pads, or sliders, a controller is designed to interact with virtual instruments in a much more natural way. It captures how hard you hit a note, how long you hold it, and how you play it — all of which make a huge difference in how the sound reacts.
If your goal is to actually play music, not just program notes with a mouse, investing in a controller is worth it. It gives you more control, speeds up your workflow, and helps you connect with your sound on a physical level.
What Is MIDI and Why It Matters in Music Production
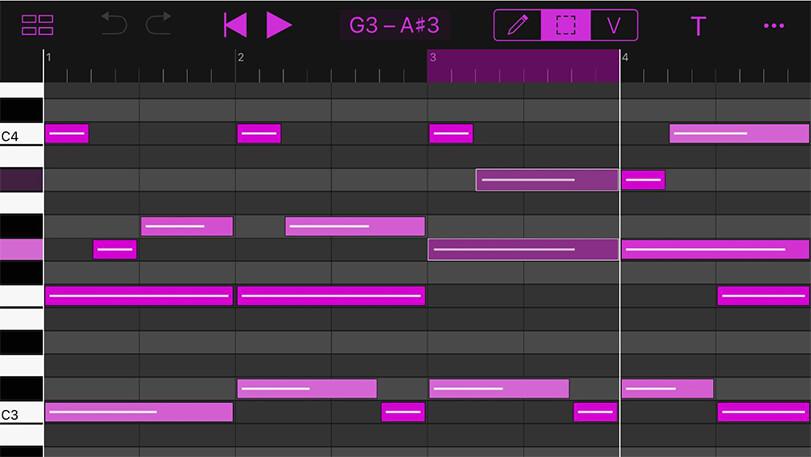
MIDI is a universal protocol that lets your gear and software communicate musical ideas. Unlike audio files, MIDI doesn’t carry sound — it just sends instructions: which note was played, how hard, how long it was held, and when it stopped. This makes it incredibly flexible for recording, editing, and arranging music.
When you press a key on your MIDI controller, your DAW receives a message like “note A2, velocity 90, duration 0.8 seconds.” If you hit a pad, the DAW might trigger a sample or launch a clip. MIDI lets you capture a performance and then swap out the instrument, tweak the timing, or adjust expression — all without re-recording anything.
Most virtual instruments rely on MIDI to function. It’s the backbone of how you interact with synths, samplers, and drum machines inside your DAW. You can change the key of an entire part, edit individual notes, adjust velocity, and automate parameters — all with zero loss in sound quality.
Quantization: When to Use It — and When Not To
One of the big advantages of working with MIDI is that you can clean up your performance after recording. Quantization is a tool that snaps your notes to the nearest beat or grid line, helping you tighten up timing if things feel off.
It’s especially handy for drums, bass lines, or anything rhythm-based where timing is critical. Quantization can help lock things in place or even shift the groove slightly to get a more laid-back or pushed feel — depending on the vibe you’re going for.
But it’s easy to go overboard. If you quantize too much, you risk removing the subtle timing variations that make a part feel human. Those tiny imperfections are what give a performance its natural movement and energy. So before you auto-correct everything, take a minute to listen and decide what actually needs fixing — and what gives your track character.
Working with Live Audio Sources: Vocals, Instruments, and Hardware
Live sound brings a unique character to a track. Even a single vocal take or an acoustic guitar recording can completely transform how a song feels. And the good news is — you don’t need a pro studio to get started. With just a basic audio interface and a microphone, you can start recording real audio into your projects. It’s a simple way to add depth and move away from overly programmed, static arrangements.
Incorporating live instruments or hardware synths expands your sonic palette and helps blend digital production with organic texture. You might track one part with a mic, another through a direct input, and then layer it with virtual instruments inside your DAW. This hybrid approach often leads to fuller, more dynamic productions.
Understanding Audio Inputs and Signal Levels
To record cleanly and avoid technical issues, it’s important to know how your interface handles different signal types. Most audio interfaces have three kinds of inputs: mic, instrument, and line — and each serves a specific purpose.
Mic inputs are designed for microphones, which output very low-level signals. That’s why mic inputs come with preamps to boost the signal to a usable level. Most interfaces have built-in preamps, but not necessarily on every channel — something to double-check before recording.
Instrument inputs are for things like electric guitars or basses. These signals are stronger than mic levels but still need some gain. Instrument inputs handle this with the proper impedance and gain structure for clean tracking.
Line inputs are meant for devices that already produce a strong signal — like synths, drum machines, or outboard gear. These don’t need additional gain. In fact, sending a line-level signal into a mic input can cause nasty distortion or even damage your gear due to overload.
Knowing how each input works and matching it with the correct source is critical for a smooth recording workflow. It’s not just a technical detail — it’s the foundation of getting great sound when working with real-world audio.
How to Set the Right Input Level for Recording
Before you hit record, it’s crucial to set your input level properly — not too hot, not too quiet. That’s where the Gain knob on your audio interface comes in. You’ll usually find it right next to the mic or instrument input.
You should adjust the level before recording starts. If your signal’s too strong, you’ll get distortion. If it’s too weak, you’ll end up boosting it later and bringing unwanted noise along with it. The easiest way to check is by watching the level meter in your DAW. Your peaks should sit comfortably in the safe range — ideally between -12 dB and -6 dB. It’s a small step that makes a huge difference in your overall sound quality.
Choosing the Right Space to Record
Microphones pick up everything — including sounds you might not even notice at first. Street noise, buzzing electronics, or room echo can seriously mess with your recording. That’s why your recording space matters just as much as your mic.
A room with furniture, curtains, or carpet will naturally absorb reflections and make a better recording environment. If you don’t have access to a treated space, get creative — even a closet full of clothes can work surprisingly well. The goal is to reduce echo and block out unwanted background noise.
Before you start recording, hit record and capture a few seconds of silence. Listen back through headphones. If you hear a fan, traffic, or the hum of a fridge, do what you can to eliminate the source or move to a quieter spot. It only takes a minute and can save you hours of editing later.
Why You Need a Pop Filter for Vocals
If you’re recording vocals, there’s one piece of gear you definitely shouldn’t skip: a pop filter.
When we sing or speak, bursts of air naturally come out of our mouths — especially on consonants like “p” and “b.” A sensitive vocal mic will pick those up as deep, unpleasant thumps. A pop filter sits between the singer and the mic and breaks up those bursts before they hit the capsule, keeping your vocal take clean and usable.
Some mics come with one included, but if you don’t have one, it’s easy to make. Grab a wire hanger, bend it into a circle, and stretch a layer of pantyhose over it. Boom — instant DIY pop filter.
Setting Input Levels: How to Avoid Distortion and Get Clean Sound
Before you start recording, make sure your input level is dialed in properly using the gain knob on your audio interface. If the signal’s too hot, you’ll get clipping. Too low, and you’ll end up boosting unwanted noise later. Watch your DAW’s meter — peaks should stay out of the red but not be too quiet either. Getting this right makes a huge difference in sound quality.
Where to Record: Find the Quietest Spot You Can
Microphones pick up way more than you think — fans, traffic, room echo. The best spot is a room with carpets, curtains, or furniture to absorb reflections. If you don’t have that, even a closet full of clothes works surprisingly well. Record a few seconds of silence and listen in headphones — you’ll quickly hear if there’s unwanted background noise to deal with.
Pop Filter: A Simple Fix for Harsh Consonants
When recording vocals, a pop filter helps cut down on harsh plosives — those bursts of air from “P” and “B” sounds that can overload the mic. It sits between the singer and the mic to soften airflow. Don’t have one? No problem — you can make a DIY filter with a wire ring and some stretched pantyhose. It works just as well and costs nothing.
Mixing and Audio Editing Basics: What You Need to Know About Building a Professional Sound
Audio editing isn’t just about cutting and moving clips — it’s about shaping your track so it feels cohesive and polished. In practice, there are two main approaches. The first is the classic “split-and-slip” method: you slice the audio into segments and shift them manually into place. This gives you precise control over timing without affecting the original sound quality.
The second method involves time-stretching, where parts of a track are sped up or slowed down to match the tempo. It’s quick and convenient, but it can degrade the sound — especially on vocals or acoustic instruments — introducing unwanted artifacts or unnatural tones.
Most professionals prefer the first method, even though it takes longer. Mixing and mastering are all about preserving the natural feel of the performance. A polished track might have hundreds of micro-edits you’d never hear on their own, but together they create a clean, balanced sound. Audio editing is detailed work — every piece needs to fit without leaving audible seams.
Why Mixing Matters and What It Does for Your Track
Mixing is the stage where all the elements of your track come together into one unified sound. The goal is to make the entire song feel like a single performance — not just a collection of separate parts.
This stage includes adjusting volume levels, panning instruments across the stereo field, applying EQ, and adding effects like reverb or delay. The goal is to make sure every sound has its space and works in harmony with the rest of the mix.
While mixing is technically separate from recording and arranging, in reality, these stages often overlap. A good mix relies not only on technical skill but also on creative judgment — it’s where the personality of the track really comes through.
Mixing Basics: How to Build a Clean, Balanced Track
Volume Management: Preventing Digital Clipping in Your Mix
The first step in mixing is setting proper volume levels. Vocals shouldn’t get buried, bass shouldn’t overpower, and drums shouldn’t drown everything out. When a sound gets too loud, it can clip — and in digital audio, that’s not a warm analog crunch, it’s harsh distortion that ruins your track.
That’s why every DAW includes level meters. Green means you’re good, yellow is getting close, red means you’re over the limit. As soon as it hits red, it’s time to turn it down. Managing levels properly not only keeps your mix clean but also gives you enough headroom for mastering later on.
Stereo Placement: Giving Each Sound Its Space
Panning is how you spread instruments across the stereo field — left to right — to avoid a flat, crowded mix. Lead vocals and bass usually stay centered to anchor the track. Other elements, like synths, guitars, or percussion, can be pushed slightly to one side or the other to add width and space.
Stereo placement helps each sound breathe. With simple pan controls, you’re shaping a sense of space that makes your track feel bigger and more alive. Done right, it brings clarity and movement without making anything feel disconnected.
Shaping Tone: How to Give Your Sound the Right Character
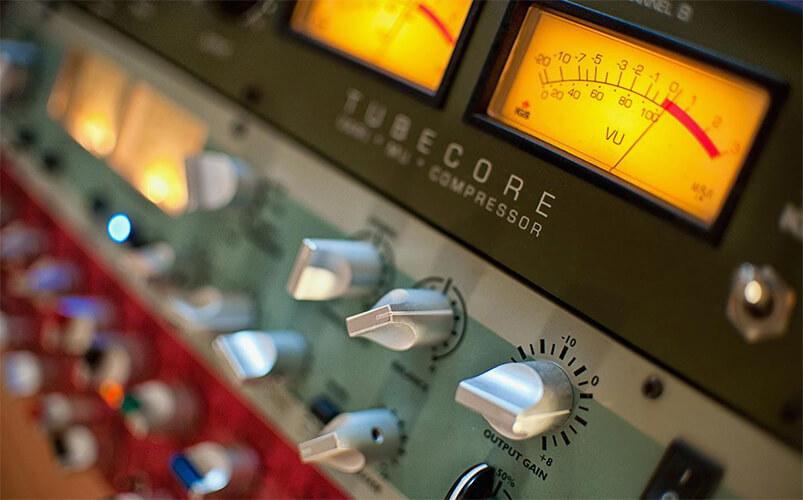
Mixing isn’t just about balancing volume — it’s also about shaping how each instrument feels. A single sound can come across as warm, harsh, dull, or bright depending on how it’s processed. To shape tone, producers use tools like EQ, compression, and saturation. An EQ can clean up muddy frequencies or boost areas that help a part stand out. Compression smooths out volume spikes and tightens up the performance, while saturation adds subtle color and depth. Even stock plugins in most DAWs offer enough flexibility to noticeably change how a track is perceived.
Final Export: Choosing the Right Format for Your Mix
Once the mix is finished, the final step is exporting the project. For mastering or further production, uncompressed formats like WAV or AIFF are ideal — they preserve the full resolution of your audio. If you just need a demo or a quick listen on your phone, MP3 will work, but keep in mind that it compresses the file and loses detail. Exporting isn’t just a technical formality — it’s the moment your mix leaves the DAW and becomes a finished product, so getting the settings right really matters.
The Final Touch: What Mastering Does and Why It Matters
Mastering is the final stage in music production — the point where the focus shifts from individual tracks to the mix as a whole. You’re no longer tweaking vocals or drums; now you’re working with the entire stereo file to bring the track up to a professional standard. The goal is to refine the tonal balance, optimize loudness, and smooth out any leftover imperfections from the mixing stage.
Mastering tools include EQ, compression, limiting, and saturation — similar to mixing, but applied to the full mix rather than individual elements. This allows the engineer to subtly enhance frequencies, control dynamics, and ensure the track sounds solid across all playback systems — whether it’s studio monitors, headphones, car speakers, or a cheap Bluetooth speaker.
When mastering a full release like an EP or album, consistency becomes key. Each track needs to feel like part of a cohesive whole, with matching volume levels and tonal character. A well-mastered track isn’t just louder — it feels complete. Mastering is what turns a technically sound mix into a release-ready product.
10 Practical Tips for Aspiring Music Producers
When you’re just starting out, it’s tempting to rush into making tracks and releasing them right away. But moving too fast can make you overlook small details that really affect the final result. Take your time and focus on building a solid foundation. Start by choosing a DAW that feels comfortable to use — it doesn’t need to be the most expensive one, just something that fits your workflow and helps you stay creative.
One of the best ways to improve is by comparing your work to commercial tracks. Listen closely to how they’re mixed — the levels, the spacing between instruments, the clarity of the vocals. You’ll often find that simpler arrangements sound better than cluttered ones. Don’t be afraid to leave space in your mix. Learning some basic music theory — especially rhythm and harmony — will also go a long way in helping you write more confidently.
EQ and compression are essential tools. Knowing how to shape frequencies and control dynamics will make your mixes sound tighter and more polished. Always record your ideas, even if they feel rough — they might spark something great later on.
If you get the chance, dig into other people’s projects. Studying how others work can be incredibly eye-opening. Try applying some of their techniques to your own music. Stay consistent — even short sessions each day are better than waiting around for the perfect moment of inspiration. And most importantly, share your music. Feedback — even from a small audience — will help you grow way faster than keeping everything to yourself.
1. Essential Gear to Start Your Home Studio
When you’re just getting into music production, it’s easy to get caught up in the gear — flashy plugins, controllers, microphones, and endless accessories. But the truth is, you don’t need a professional setup to begin. What really matters is knowing what you want to make — beats, vocals, full tracks — and building your gear list around that.
The heart of your studio is the computer. It doesn’t have to be top-of-the-line, but it should have a solid processor, at least 8 GB of RAM, and a fast SSD. These specs help keep your DAW running smoothly, especially when you’re working with multiple tracks and virtual instruments. A second monitor isn’t essential, but it definitely helps — keeping your mixer and arrangement view side by side speeds up the workflow.
Next comes the audio interface. A basic two-in, two-out model is enough to start — it’ll let you plug in a mic, headphones, or an instrument and get clean recordings with low latency. Pair it with a compact 25-key MIDI keyboard. Even a small one will make writing melodies and building arrangements much faster than clicking in notes with a mouse.
Monitoring is just as important. A pair of decent headphones and some entry-level studio monitors will help you hear your mix more accurately and understand how your music will sound in different settings. And if you plan on recording vocals, a large-diaphragm condenser mic is a great starting point. You don’t need to break the bank — plenty of affordable models can capture clear, detailed vocal takes, especially if you’re recording in a quiet room.
2. Why Room Acoustics Matter More Than Expensive Gear
One of the most common mistakes beginners make is overlooking room acoustics. Even with great monitors and a solid audio interface, you won’t hear your mix accurately if your room is full of uncontrolled reflections. Without some basic acoustic treatment, you’re not really hearing your music — you’re hearing the sound bouncing off your walls.
The good news is, you don’t need to spend thousands to make a difference. Simple, affordable fixes can go a long way. The main goals are to reduce reflections, especially in the midrange, and to control low-end buildup, which usually collects in the corners.
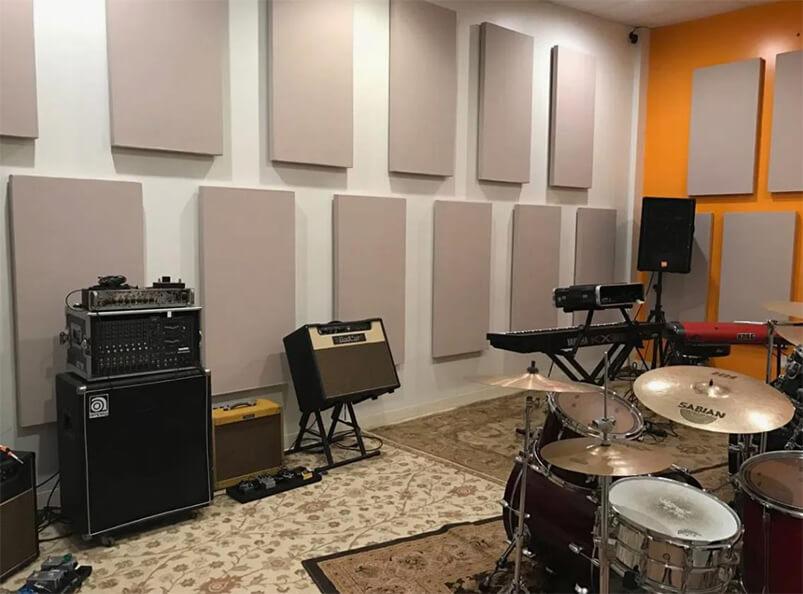
Start with basic wall and ceiling panels made from mineral wool or fiberglass — these materials are far more effective than cheap acoustic foam. If possible, place diffusers behind your listening position. Unlike absorbers, diffusers scatter sound waves evenly, helping your room feel more open and natural.
Just don’t overdo it. If the room becomes too “dead,” you’ll lose the sense of space that’s important for mixing effects like reverb and stereo width. The goal is balance — enough control to hear your mix clearly, but not so much that the room feels lifeless. In a well-treated space, even modest gear will give you a clearer picture of what’s really happening in your mix.
3. How to Choose the Right Music Software for Your Workflow
These days, you don’t need a full studio setup to start making music. Everything — from tracking to final mix — can be done in a single piece of software. It saves money, speeds things up, and lets you revisit your projects anytime.
The key is finding a platform that feels intuitive. Some tools are geared toward electronic music and sample-based production, while others are better suited for recording instruments and detailed mixing. Before settling on one, try out a few options — many offer demo versions so you can get a feel for the workflow.
Don’t waste time chasing the “perfect” program. Any decent software will get the job done if you know how to use it. Focus on learning it well and making the most of what it offers, instead of constantly switching tools in search of something better.
4. Trust Your Ears: Why Listening Matters More Than Visuals
Once your setup is in place and your software is ready, it’s time to focus on the actual sound. At this point, many beginners fall into the same trap — relying too heavily on what they see on the screen instead of what they hear.
Modern music software is packed with visual tools like spectrum analyzers, level meters, and oscilloscopes. These can be incredibly helpful for spotting frequency clashes, managing dynamics, or checking loudness. But they’re just tools — they shouldn’t be the foundation of your decision-making.
Your ears are your most important asset. They tell you how a track actually feels, which is what listeners respond to. No graph can replace your perception of balance, space, or emotion. Sometimes, the best move is to close your eyes and just listen. Without the distraction of visuals, you’ll notice subtle things: areas that feel too crowded, places where the mix lacks clarity, or moments when a vocal gets lost. These are the details that really matter — and they’re only obvious when you’re focused on the sound itself.
5. Use Pro Tracks as a Reference Point, Not a Blueprint
Most producers start out influenced by a particular genre — it shapes your taste and inspires your early ideas. But loving a style and understanding how it works are two different things. If you want your music to hold up in that space, you need to study how tracks are actually built.
One of the most valuable habits you can develop is actively analyzing tracks you admire. Don’t just enjoy them — break them down. Pick a reference song and figure out why it sounds so good. Pay attention to the balance of instruments, the frequency spectrum, the types of effects used, and the overall dynamics. Take note of the BPM, structure, and mixing techniques — anything that defines the sound of that style. Writing these observations down can help you absorb and apply them faster.
Over time, this approach will sharpen your ears and help you recognize when your own track “fits” within the genre. More importantly, you’ll learn to adapt ideas from others without copying — keeping your own sound while staying true to the genre’s expectations.
6. Style Over Imitation: Finding Your Own Sound in a Genre-Driven World
As you dive deeper into music production and start referencing tracks you admire, it’s easy to fall into the trap of copying what you hear — especially when something sounds polished and powerful. But mimicking what works for someone else won’t help you stand out in the long run.

Reference tracks are great for understanding the framework of a genre — structure, tempo, tonal balance. They’re tools for orientation, not templates to duplicate. If you follow every move too closely, listeners are more likely to hear repetition than originality. Your job is to take what defines the genre and speak that language in your own way — whether that’s through unexpected sounds, a unique arrangement, or the way you use effects. Anything that reflects your personal ideas gives your track energy and identity.
Signature style doesn’t appear overnight. It’s the result of trial, error, and a willingness to experiment. The earlier you start shaping your own approach, the faster your sound becomes something people recognize. And this isn’t just about artists — even mix engineers develop a sonic fingerprint over time.
7. Don’t Overload Your Track: Less Really Does Sound Better
“Less is more” might sound cliché, but it’s one of the most reliable truths in music production. New producers often try to fill every gap in an arrangement, adding layers until the track feels crowded and loses its clarity.
During the writing process, it’s tempting to throw in another pad, more percussion, or an extra melody to “fill out” the song. But the more elements you add, the harder it becomes for each one to breathe. Instead of sounding full, the mix turns muddy and unfocused. This is especially true with drum layering — stacking multiple kicks or snares with different effects rarely helps unless you have a clear reason. One well-chosen sound often does more than three unnecessary layers.
The same goes for recording. If you only plan to use two or three takes in your final mix, recording twenty nearly identical versions just creates clutter. You’ll spend more time sorting and less time actually building the track.
Even in the mixing and mastering stages, overprocessing can become a problem. When you’re stacking six or seven plugins on a single track just to make it work, chances are the issue lies in the source. It’s often better to go back to the sound design or recording stage and fix it there than to patch it with endless compression and EQ.
Empty space in a mix isn’t a weakness — it’s what gives the track room to breathe. Clean, focused arrangements always connect better than overloaded ones. It’s not just theory — it’s something most producers learn the hard way through experience.
8. Level Up Faster: Why Watching Experienced Producers Is Invaluable
If you ever get the chance to sit in on a session with an experienced producer or engineer, don’t pass it up. There’s nothing quite like seeing the full process unfold in real time — from setting up a session to exporting the final mix. Even just a couple of hours in a professional environment can teach you more than weeks of trial-and-error on your own.
That said, not everyone has access to a studio — and that’s totally okay. These days, there’s a massive amount of knowledge available online. YouTube tutorials, music production courses, livestreams, masterclasses, even books on mixing and mastering — all of it can help you understand how things actually work. The key is to watch actively. Ask yourself: Why did they choose that plugin? What changed after that adjustment? How did that one move make the mix tighter?
One great way to evaluate your progress is by uploading your track to an online mastering service and comparing the result to your own version. It won’t teach you everything, but it will highlight what you’re doing well — and where your mix still needs work.
Still, nothing beats watching someone work in real time. Even just observing how a local producer builds an arrangement, sets up effects, or processes vocals can give you insight into their workflow and decision-making. And if you can ask questions along the way? Even better.
9. Why Feedback Matters — and How to Make It Work for You
At some point in the music-making process, you’ll need to let someone else hear what you’ve created. Not just for validation, but to understand how your track lands outside the comfort of your own studio. Even feedback from a casual listener — someone with no technical knowledge — can tell you whether your music actually connects.
Non-musicians won’t care about how you EQ’d the drums or whether your vocals sit perfectly in the mix. They’ll just feel it — or not. If someone listens all the way through, gets into it, or plays it again, that’s a good sign. If they lose interest halfway, that’s worth paying attention to too. It tells you something’s missing — maybe the intro’s too long, the energy dips, or there’s too much going on.
Feedback from other producers or more experienced musicians hits on a different level. They’ll spot technical flaws: muddy frequencies, misplaced layers, weak transitions. But this kind of critique isn’t personal — it’s support you’d never get working alone. And the more you welcome it, the faster you grow.
That said, not all advice is helpful. Some feedback is shaped by personal taste, not actual problems in the track. That’s why learning to filter is key. Take in the comments that clearly improve your mix or arrangement — and leave behind what clashes with your creative intent. Feedback should sharpen your sound, not steer you away from what makes it yours.
10. Taking Breaks: How to Protect Your Ears and Keep Your Mix Honest
Listening fatigue is one of the sneakiest problems in music production. When you work on a track for hours without stepping away, your ears start to dull, and your sense of balance, frequency, and space goes out the window. Everything might sound fine in the moment, but when you come back the next day, you’ll often find over-compression, harsh EQ, or imbalances that could’ve been avoided with a clear head.
Even if you’re in the zone, it’s smart to take a short break every hour — just 10 minutes away from the speakers can help your ears reset and keep your decisions sharp. And if you’re spending three hours or more on a session, make time for a longer break. Step outside, get some fresh air, let your mind and hearing recharge.
Avoid mixing or mastering right after loud events or parties. If you come home with even a slight ringing in your ears and jump straight into a session, your perception is already skewed, and you’re putting extra stress on your hearing. Not only will your mix suffer — you’re also risking long-term damage.
When you’re deep into mixing or mastering, maintaining a fresh perspective is everything. Sometimes the smartest move is to walk away and come back the next day. It’ll save you time in the long run, with fewer revisions and better results.
Taking breaks isn’t procrastination — it’s part of the process. It keeps your ears accurate, sharpens your attention to detail, and helps you make better calls in every part of the mix. If there’s one simple habit every producer should build early on, it’s this one.
How to Develop Your Own Sound
Creative Freedom and Expanding Musical Imagination
Music production is one of the few creative spaces where breaking the rules is often the best way forward. If you want to develop a sound that’s truly yours, you need to let go of safe formulas and experiment freely. That might mean layering unexpected textures, bending traditional song structures, or building tracks around strange, non-musical sounds. Some of these ideas won’t work — and that’s the point. Every failed experiment teaches you something. Over time, you’ll start recognizing what fits your vibe and learn how to shape it intentionally.
The more you push boundaries, the more clearly your artistic identity will emerge. Instead of copying what works for others, you’ll begin reworking ideas through your own perspective — and that’s where originality takes root.
Collaboration and the Power of a Musical Community
Working with other artists is one of the fastest ways to grow creatively. Collaboration brings fresh perspectives and can lead you to ideas you wouldn’t have found on your own. Sometimes a single comment from a vocalist or a spontaneous session with another producer can completely reframe how you approach a track.
Community is just as important. Whether it’s participating in challenges, hanging out in online producer forums, or going to local meetups, connecting with others keeps you sharp. Being surrounded by people who share your passion pushes you to improve — and reminds you that mistakes aren’t failures, they’re steps forward. Growth doesn’t happen in isolation. The more you exchange ideas, the faster your sound evolves into something real and personal.
How to Unlock Your Creative Potential
Developing a Personal Sound
Finding your own sound starts with observation and experimentation. The more music you listen to — across styles, cultures, and production approaches — the more clearly you’ll start to recognize what resonates with you. The goal isn’t to copy, but to reinterpret those influences in your own way.
Weird samples, unexpected transitions, unconventional processing — these things might feel random at first, but over time they become part of your creative fingerprint. Patterns will emerge naturally. You’ll begin to hear which decisions consistently reflect your taste and what makes your music different. It’s a gradual process, but that’s exactly what makes your sound personal and memorable.
Sharing Your Voice Through Music
Making a track is only half the journey. The other half is putting it out there and letting people connect with it. And that connection grows stronger when you share more than just the audio. Talk about the process, the inspiration, the story behind a particular moment in the track. That kind of openness draws people in.
Use whatever platforms are available — streaming services, social media, live shows. Even a short video clip or demo with a personal caption can be more engaging than a polished track released with no context. Listeners don’t just want the final product — they want to know the person behind it. The more honest and direct you are, the more your music will resonate. Because when you’re not just broadcasting sound, but actually communicating something real, people notice — and they stick around.
Final Thoughts for New Music Producers
Music production isn’t just about technical steps — it’s about how those tools help you express an idea. In the beginning, it’s easy to get overwhelmed by plugins, gear, and endless advice. But the key isn’t to learn everything at once. Start simple: get comfortable with your setup, train your ears, and don’t be afraid to explore what feels unfamiliar.
The good news is, you don’t need expensive gear or a formal education to start. With just a laptop, some free software, and a real interest in learning, you already have what you need. Everything else comes with time and practice. Watch how others work, borrow ideas, tweak them to fit your style — and don’t be afraid to make mistakes. You’ll learn more from what goes wrong than from what works right away.
One question you should keep asking yourself is: what am I really trying to say with this track? That’s where the meaning lives. When your music reflects something real, something personal — it resonates. Even if only one person connects with it at first, that’s still a win. In the end, it’s not about perfection. It’s about making something that feels honest. And when it’s honest, people will feel it too.

Let's explore what's out there and help you find the tool that fits your workflow — or you can skip straight to making beats ...

Lo-fi music is ideal for videos that aim to create a relaxing and calming atmosphere ...

Music is not only theory and terms. It is, first and foremost, a feeling. That is why when studying guitar triads, it is important not only to understand what they are ...

In the world of choral singing, every element plays a key role. From the subtleties of dynamics and articulation to the size of the group ...

AI music generator is an umbrella term for a variety of tools that use machine learning to create musical material. But not all generators work ...

When studying dynamic compression or searching for experimental audio processing techniques, you may have come across the term “upstream compression” ...

To understand the principle of operation of a vocoder, we can draw an analogy with the human voice ...

A few simple tips will help you give your voice a professional sound. We will explain how to competently process vocals in a simple audio editor, and share the effects that musicians use ...

Musical art includes three key components: melodic lines, harmonic accompaniment and rhythmic structure ...