Graphic equalizers

Most of us dealt with the Equalization of audio even much before we got an idea about creating our own music. It is widely used in most domestic appliances that are designed to play audio: video and audio players, computers and laptops, speakers, various portable audio gadgets, mp3 players, smartphones etc. The equalizing tool can be realized or implemented as hardware or software. Professional audio equipment is mostly based on such process as equalization is working with sound frequencies and the frequency is essential in the nature of sound. For audio engineers, EQ technic is a powerful tool of their audio magic. The main idea of any EQ is to give control over specific sound frequency ranges, granular control of the sound volume. In a previous article about equalization we went through the definition of equalization, principles, and fundamentals of audio equalization, types of EQs, and other related aspects. In the current one let’s review more in detail a graphic equalizer tool as one of the main types of equalizers.
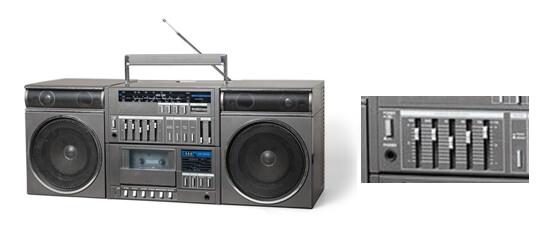
Typical Cassete Player 5-bands EQ
Agraphic equalizer is well known and one can tell it is classic to use this kind of EQ in all categories of audio equipment and software from amateur to professional level. The idea of graphic EQ is that all range of frequency is divided into groups each frequency group is controlled by a slider or knob that lets boost or cut attached fixed frequency band. The simplest example is 3-band EQ that may have “bass”, “mid”, “treble’’ knobs. In this case, very roughly speaking, but typically for 3-band EQ range of frequency is divided from 20 Hz – 300 Hz that is “bass”, 300 Hz – 4 kHz that “mid”, and “treble” is all above 4kHz. Changings in volume on resulting audio when applying an EQ may vary, some effect output volume just in range of +/-6 dB, while others allow to boost or cut the level more than 20 dB. Sone EQs include an additional “preamp” slider that can rise the input levels, that increase the main output volume.
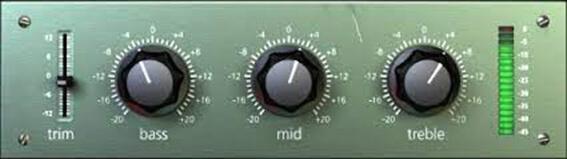
3-band graphic EQ example
Most graphic EQs have between 3 to 31 bands. In professional equipment is commonly used 31 bands EQ. If such EQs a designed in a traditional way then the distance from a central frequency of a band is 1/3 of an octave to a central frequency of a band next to it, so these three bands cover a combined bandwidth of one octave.
When it comes to a traditional design of a graphic EQ must admit that the center frequency of each band is fixed.
There are variations of graphic EQ designs and the number of bands is determined by the required accuracy of sound settings. Very often can see such EQs among stage equipment.
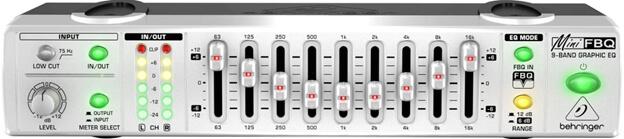
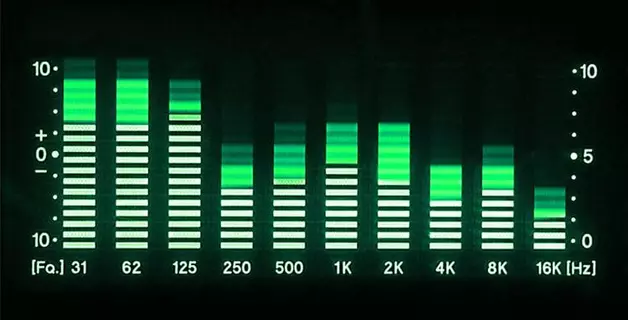
9-band graphic EQ example
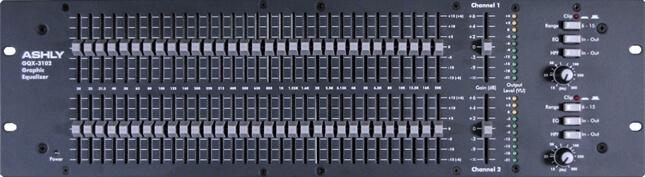
31-band graphic EQ example
The visual simplicity of graphic EQs makes them easy to understand and use. Many consumer audio goods, consumer audio software implement this kind of EQ.But this type has also some disadvantages. Between bands, narrow specific crossfades appear, for example, if turn down a few sliders in a row, as soon as narrow frequency bands start to extrude, tiny frequency pikes will appear between those bands.
Graphic EQ is fine to use for making small adjustments over a wide spectrum to polish a final mix. According to this on modern digital consoles, graphic EQs can be found as a post-fader insert. Therefore, for particular work on cleaning a mix, most audio professionals prefer to deal with parametric equalizers. Here are some little frequency adjustment tips, that overview which bands affect specific sound characteristics.
Sub-Bass (16 Hz to 60 Hz). These frequencies can add some power to a final mix. It is more felt rather than heard. But over boosting can make the whole mix sounds muddy.
Bass (60 Hz to 250 Hz). Making changes over these ranges can make your mix sound fat or thin, as it contains fundamental notes of the rhythm section.
Low Mids (250 Hz to 2 kHz). Increasing the level from 250Hz – 500Hz can clarify the bass section and low-frequency instruments in the mix. Range of 500 Hz – 2 kHz contains some midrange instruments ( guitars, saxophones, etc.) adjustment made in the current range can make those instruments sounds brighter, but over bosting will make a mix sound thinner.
High Mids (2kHz to 4 kHz). Changes in this range effects midrange instruments, and give you control over percussive and rhythm instruments.
Presence ( 4 kHz to 6 kHz). Adjust a perception of a mix by a listener in perspective of a distance, it can sound closer or further, also less or more transparent.
Brilliance (6 kHz to 16 kHz). Much clarity and brilliance of a mix are hidden in this range work accurate with it as over boosting will lead to clipping.
In some cases equalizer makes audio sound less natural so trying to fix bad recorded mix with the help of technic tools can fail.
Increasing of band parameters also effect closest frequency bands in crossfaded points, as soon as applying changes graphically looks as a shape of a bell.
Happy Mixing!