Guitar recording
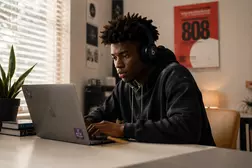
Sooner or later any guitar player will find it necessary to record his music. Some do it just for themselves, others put their creations on the internet, while for others it’s the first step in their future music career. Recording a guitar is an unavoidable step towards perfecting you’re playing, without which further progress is impossible. It’s a great opportunity to hear yourself speak from the sidelines and to understand your own mistakes and weaknesses.
Introduction
In the past, recording a guitar involved going to a recording studio, which not every aspiring musician could afford. But thanks to advances in recording equipment and computer technology, music lovers have long had the recording alternative to their guitar at home.
It’s perfect for anyone who composes their music, likes to “jam” with friends or just wants to practice and improve their playing regularly.
There are ways a number to record guitar at home today. In this article, we’ll cover the process basics and provide some tips to get you started. For guitar lovers, there are different ways a number to record on a personal computer. From this list, everyone will be able to choose the most suitable way to record electric and acoustic guitar.
Recording equipment
Everyone has probably seen recording studios pictures with microphones, consoles, monitors and other sophisticated equipment lots. It all looks very impressive. In the past, collaborating with recording studios like this was the only way to get quality guitar recordings.
Today, you can achieve the same result on your own, using equipment that isn’t too sophisticated. Rapid advances in technology have made good recording equipment affordable. Here’s what you need a list to record your guitar at home:
- An audio interface. A device that lets you connect your guitar and other audio equipment to your computer;
- Microphone;
- You can record an electric guitar without one, but you can’t record an acoustic guitar without a mic;
- DAW, or digital sound workstation. All the software you need to record, sequence, and mix your tracks;
- Plug-ins. The software part lets you create additional effects on your recording, from classic guitar effects to adding virtual synths or a drum kit;
- Speakers and headphones. You can use your standard computer speakers for recording, but you’re far better off using a high-quality studio model.
There’s an alternative way to record your guitar that doesn’t involve a sound card or audio interface. We’ll talk about them in detail below.
Audio Interface
The first thing to decide is how to connect your guitar to your computer. This is usually done using an audio interface or external sound card.
An audio interface is a device that converts analogue audio signals from an amplifier and microphone into digital information that can be processed by a computer. The reverse process – the digital signal from the PC is converted and sent to your headphones or speakers – also runs through it. For connection to other devices, the audio interface offers various connectors: analogue inputs, digital inputs and outputs.
Modern audio interfaces have virtually no DAC/DAC quality, but manufacturers bundle them with preamps with a wide variety (preamplifiers). It is better to buy a sound card with multiple inputs, which allows you to connect several instruments or microphones. Professional cards are equipped with a powerful processor, which can significantly relieve your computer CPU while recording and processing music.
Audio interfaces many models already have DAW and different plug-ins, useful for musicians. In general, today, it is possible to buy a decent sound card for $100-150. It is possible to find cheaper models, but they can disappoint guitarists with their quality. When choosing a sound card, keep in mind that some are only compatible with Macs or PCs.
If you need an audio interface for an acoustic guitar, you should opt for a device with multiple inputs. The point is that this instrument is better recorded with two microphones at the same time, placing them one close to and the other at some distance from the guitar. This allows you to get two different sounds and then mix them. Having two microphones will also allow you to play your guitar and sing at the same time.
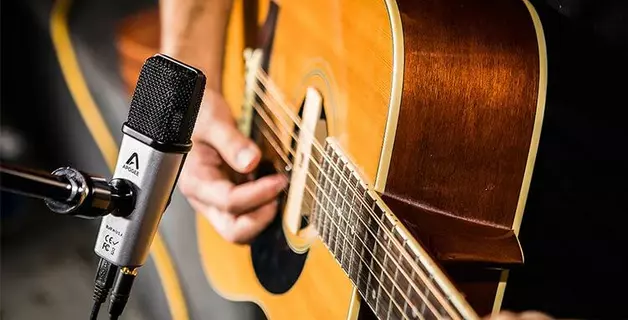
Microphone
You can record an electric guitar without a mic – you can plug it into your sound card directly. But if you’re recording an acoustic guitar, other instruments or vocals, you’ll need a microphone and an audio interface with a mic input. There are microphone models’ a huge variety on the market today, for all tastes and budgets.
For recording instruments, there are microphones three types:
- condenser microphones;
- dynamic;
- tape.
Dynamic microphones are this device oldest type. Its design is simple and has been perfected over decades. Therefore, dynamic microphones are highly reliable and reasonably priced. Such devices are great for capturing the guitar sound middle frequencies, the work with the bass in dynamic microphones is worse.
Condenser microphones are more expensive than dynamic microphones, but they cover a better frequency range and are more sensitive. However, these devices are fragile, so they are not well suited for concert performances. They are also very sensitive to volume levels and are best positioned 30-50 cm away from the loudspeakers.
Ribbon microphones are considered the most expensive. But they provide stunning quality for recording guitar sound. A device like this is hardly worth buying for the aspiring musician. Also, you should mention, that ribbon microphones are not subject to mechanical impact and are better to be placed 25-30 cm away from the source.
The time most, guitars are recorded with dynamic microphones – sometimes you’ll have more than one device of different types (a dynamic and a tape recorder, for example).
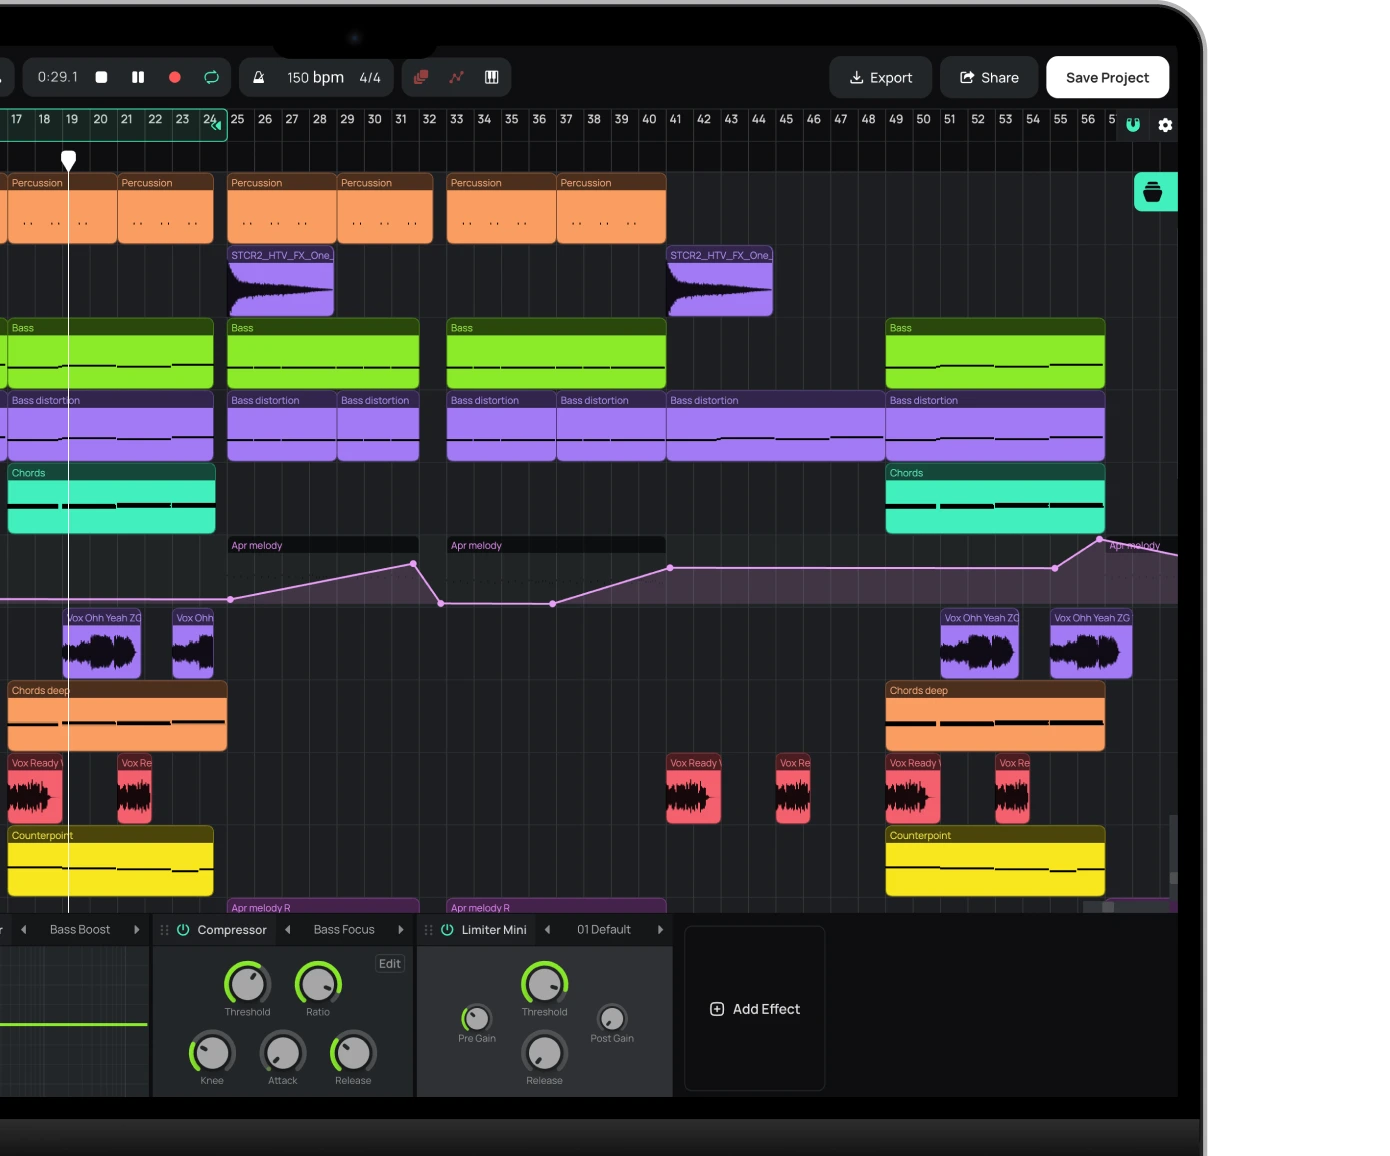
DAW
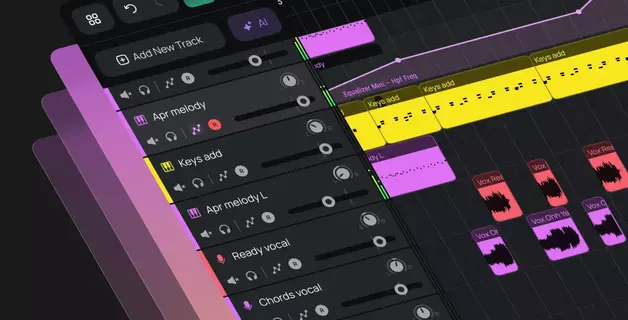
Besides sound cards and microphones, to record an acoustic or electric guitar you need a DAW or a digital sound workstation.
Everyone’s probably seen complex mixing consoles a lot in recording studios, right? A DAW is the computer counterpart to this console kind, this equipment is a virtual version. This sound station kind is programming a set that includes the main component and auxiliary tools an extensive set: amplifiers, plug-ins, loops. Additional elements are plenty despite, such sound station possibilities depend first on the DAW characteristics.
Although such a program interface can be dumbfounding at first acquaintance, learning how to use such software is not difficult.
The DAW main task is one or more instruments recording parts in separate soundtracks, applying various effects and mixing them to the final track.
There are about a dozen DAWs out there that are best suited for guitar recording. They all work on the same principle, so the choice mainly depends on interface preference. The best workstation is the one you feel comfortable working in.
The algorithm for these programs is as follows:
- track creation;
- recording a guitar track;
- layering effects;
- mixing the track to create an mp3 file.
You can also add that many DAWs have simplified versions. They limit the tracks number and special effects to be recorded, and may not support certain plug-ins. Popular soundcards most already have DAWs, which are often installed with a simplified version.
Any medium-sized laptop or computer from recent years can handle DAW support. Sound processing plug-ins also don’t require much. Bias FX 2, for example, requires:
- 4 GB RAM (8 GB is best);
- 1.5 GHz processor (preferably 2.0 GHz);
- Free disk space 500 MB.
Plug-ins
With a sound card, microphone and DAW station, it’s already possible to record a guitar on your computer. In this case, however, you’ll just get a clean sound, without any additional effects. You need plug-ins to create them.
You can use such applications only if your DAW supports them. This is why s sound workstations implified versions significantly “impoverish” the guitar recording. With plug-ins, you can shape the tone of your instrument by adding effects and amplifiers.
Speakers
Mixing speakers are critical to your final sound quality. Ordinary ”consumer” speakers are poorly suited for this. They tend to distort the sound they produce. That is why sound engineers and musicians try to use special studio devices.
Most amateur speakers can completely transform a recording’s frequency range, making it brighter and more appealing. They usually boost the bass, strip out the midrange and boost the treble. When you’re mixing a tune in the studio, you don’t want it an ‘enhanced’ version – you want the actual soundtrack. Studio speakers guarantee the tune ‘real’ sound.
Choosing good studio speakers is a big, complex subject that traditionally stirs heated debates among musicians and recording engineers.
Kombo amplifier
A combo amp is a device that combines a loudspeaker, amplifier and preamp in the same enclosure. Buying one is usually more economical than buying the two individually. Virtually all combo amps have a line input that you can connect your instrument to. They, therefore, allow you to record an electric guitar without a microphone.
Speakers and amplifiers can also be purchased separately, in which case the entire set is referred to as a guitar stack. In music slang, amplifiers with preamps are usually referred to as speakers a “head” and a set as a “cabinet”. Amplifier kits can be:
- tube-based;
- digital;
- transistor;
- hybrid.
The tube combos were the first to emerge. They are still in use today, delighting guitarists with their warm “tube” sound. However, such devices have a serious disadvantage – they are bulky and heavy. In addition, tubes need to be handled with care. Usually, tube combo amps are used in recording studios, at concert venues and at rehearsal studios. If you are a beginner, an amplifier is a good choice if you intend to make serious music and have a sufficient budget.
The tube amplifiers have been replaced by transistor amplifiers. They are small in size and affordable. So, these amps are ideal for the home studio. However, transistor amplifiers are said to be inferior in sound quality to tube amplifiers.
Hybrid combos are an attempt to combine the tube-based devices’ quality with the transistor-based one’s convenience and affordability. Their design combines both technologies. These combo amps sound quality is close to the tubes, but they are also more expensive than transistor amps. This amplifier type is suitable for home recording and rehearsal.
Digital amplifiers replace the conventional preamplifier with a computer to generate the guitar sound. Such amplifiers are reliable, affordable, compact and give a good sound at any volume. Digital amplifiers are also great for home use.
Choosing the combo amplifier right type and model depends on what you are going to use it for. Think about what you need for rehearsal and recording or gigging? For home use a 10–15-Watt device will do; for gigs look for a 50-Watt device.
It is worth remembering that the combo amps different types’ power cannot be compared. For example, a 20-watt tube combo sounds louder than its transistor counterpart. Before buying, it is better to listen to all the options and then make a decision.
There is another important thing to consider – guitar and combo should match each other in price and quality. There is no point in buying an expensive amplifier with a mediocre instrument, there will be no perfect sound anyway.
Studio headphones
If you want to record an acoustic guitar, vocal, or any other instrument with a microphone, you’ll need good headphones with reliable soundproofing. The headphones choice is a delicate subject, as it provokes heated debate.
There are stringent requirements for this device type. Not only do they have to suppress ambient noise reliably, but they have to convey every note in a song. Usually, headphones for recording guitar have a high impedance (25 ohms or more) to prevent the sound from sounding false. Studio headphones usually have a good frequency range from 5Hz to 25-30kHz.
Equally important is the headphones’ design – they should fit comfortably on your head and not interfere with the musician’s performance.
Reamping
Reamping is another way to record a guitar. It’s most often used in studios, but you can theoretically reamp it yourself. Just make sure you have all the necessary equipment available. This method is used to record electric and bass guitars.
To reamp the instrument:
- a musical instrument;
- а sound engineer’s console or computer;
- a Di-Box;
- amplifier;
- a microphone.
A Di-Box or direct box is a device that equalises the difference in impedance between the amplifier, the console and the guitar.
The process can be described as follows: first, a “raw” sound signal is sent to a console or computer via Di-Box, then the same signal is sent to an amplifier, where it is processed and recorded with a quality microphone. The raw signal from a musical instrument is often referred to as a DI signal.
Reamping allows you to get two signals at once: a raw signal and an already processed one. If there is any question about the latter, you can run the original signal through the amplifier again, but with different settings. This method main advantage is the original recording preservation, which allows for further refinement. However, this method requires the highest quality equipment.
Guitarist Les Paul and sound engineer Phil Spector were the first to separate the recording and post-processing stages. With the digital technology development, reamping has lost its popularity.
Recording an electric guitar on a PC
Recording an electric guitar to a computer is a lot easier than recording an acoustic instrument. You can do it in two ways:
- through an amplifier and a microphone;
- “in-line”.
The first method is pretty straightforward: you connect your guitar to an amplifier, and a microphone picks up the sound. It’s then fed to your computer via an audio interface.
However, this method is not suitable for home use, it is usually used in studios. The thing is that to get a good sound, you need to “warm-up” an amplifier beforehand, in other words, to significantly increase its volume. This is not very convenient to do in a city flat.
There is another important nuance – the microphones’ number and location during recording. You can make do with one device – for an electric guitar, it is enough. However, two microphones at different distances will give their sound their shades, from which you can then make a more beautiful composition.
Equally important is the distance from the microphone to the speaker. The closer it is, the richer and more vivid the sound. Moving further away there is space and volume a sense in the signal. The optimum distance is 10 inches between the microphone and speaker. Several microphones at different distances from the sound source produce interesting results.
When recording an electric guitar with a microphone and amplifier, it is advisable to use a Di-Box. This way you can preserve the “raw” guitar sound. If the track is unsuccessful, it can be re-processed with plug-ins and avoid unnecessary re-recording. Also, remember to play your electric guitar loud – it’s the only way to unleash both the instrument and your amplifier full potential.
“In-Line”
This is the easiest way to record an electric guitar, and it’s ideal for home recording. You don’t need to spend money on a mic, amplifier or any other equipment. The electric guitar is connected to an external sound card and then to a computer. The recording is processed using a workstation and plug-ins.
Recording an acoustic guitar on a PC
What’s more difficult is making a proper recording for an acoustic guitar. That’s because this instrument is very rich in frequencies and timbres. You need at least two high-quality, expensive microphones to get them right. Them one captures mid frequencies, strings sound, attack, and the second one is used for bass and treble. Condenser microphones are better suited for working with ”acoustics”.
Keep in mind that playing with a plectrum produces a more resonant and sharp sound. Fingers make it sound muffled and voluminous.
When recording an acoustic guitar, microphone placement is very important. It’s not uncommon for beginners to make the placing the unit mistake in the socket front. In this case, the sound will be rich in low frequencies, while the highs and mids of the spectrum will be lost. Placing a microphone in front and to the deck side will remove the strings echoes.
If a single microphone is used, it is best placed approximately opposite the 12th fret. In this case, you can get both the strings sound and the guitar ‘inner voice’. However, with this positioning, the plectrum clicks will be audible.
When recording with two microphones, one should be placed in the 12th fret front, and the other should be used to capture the soundboard sound. It is best to place the devices at right angles to each other to avoid problems with the sound waves’ phase. Another microphone can be placed behind the performer, pointing towards the back deck.
There are many nuances to recording an acoustic guitar. For example, the sound quality is strongly influenced by the room. A dull room will emphasize the bass, while a ‘ringing’ room will emphasize the upper frequencies. A common mistake is to place the musician in the room a corner. The best place for him or her is in the middle of the room. It is better to record in a room with hard surfaces a lot – in this case, you will get a more voluminous and characteristic sound.
You should also pay attention to the extraneous noises present in the room where the recording takes place. It is advisable to keep them to a minimum. Some recording moments require complete silence until the guitar fades out.
It’s a good idea to record each acoustic guitar track several times. The best sound can then be formed from the resulting selections.
Record a guitar without a sound card
You can record a guitar on your computer without using an audio interface, straight to your PC’s sound card. Technically speaking, a PC sound card is the same as an audio interface, but its specifications are minimal.
To record your guitar to your PC audio card, you’ll need a 6.5 to 3.5mm adapter and computer software a standard set: DAW and special plug-ins. In addition, you’ll have to install the universal audio driver ASIO4ALL, which allows you to record audio without delay.
However, this recording method does not allow for decent results. At best, it will be acceptable. Typically, when you record guitar through your computer’s sound card, the instrument sounds muffled and dull, the attack is gone, and frequent delays prevent you from playing energetic compositions. In the worst cases, you might hear wheezing, squeaking, humming and other serious interference.
An external sound card with good performance can solve these problems all.
Other budget options
Other budget-friendly recording options don’t require an audio interface. Use a smartphone or a cheap talking microphone, for example.
For the simplest home recording, you can use a regular conversation microphone like Zoom. You don’t need a stand for it, just put it in front of you and start playing. When you are done, you can transfer the recording to your computer on a memory stick. The best way to work with this device type is through Audacity software. This method is not a bad option for beginners, as it allows you to listen to yourself, find mistakes and correct them.
Some laptops have relatively good microphones, which can also be used for self-tests.
An even simpler option is a voice recorder in a smartphone. Some such devices are capturing audio capable quite well. A smartphone is not only suitable for self-testing, but also for mixing guitar and vocal tracks. You don’t even need to download any additional software – the minimum necessary is already available on your mobile phone. The main advantage of this method is its simplicity and accessibility. Your smartphone’s always on hand, so you can make an impromptu recording in no time.
Tips for recording guitar
And now for some tips that work for beginners and experienced musicians alike.
Don’t forget about phase correlations
Acclaimed producer and sound engineer Oz Craggs believe phase correlation between microphones is crucial to recording quality.
Phase problems occur because the sound reaches one microphone earlier than the other during recording. This results in distorted sound.
You can check the correct microphone placement by using an amplifier, DAW and reamp box. The sound waveforms should be aligned on the computer screen. Make sure the microphones are correctly positioned before you start recording.
The right pickup is important
Before recording or performing, it’s important to choose the right plectrum. Soft ones are good for drumming, hard ones for grooving. It’s best to prepare a few great picks in advance for the part different parts.
This will allow you to change the sound of the instrument even without additional equipment adjustments. A soft pick, for example, will help you get rid of an unnecessarily harsh sound, while a hard pick will add drive and expression.
Guitar tuning
A good-sounding recording begins, of course, with a perfectly tuned instrument. A properly tuned guitar won’t tingle, make other distracting noises or loose tuning. Most importantly, it will make the instrument easier for the musician to play.
The term “tuning” includes adjusting the strings, pickups, checking the bore and anchor. Equally important is the guitar strings themselves condition. Before you play your instrument, it’s best to get new strings a set and give them time to stretch out. If there is no possibility to change strings, you can at least wipe them with a cloth soaked in alcohol. It is advisable to check the instrument tuning before each take.
Try to achieve the same sound that you wish to achieve on the recording
When recording an electric guitar, always begin by checking the instrument and its tuning. If it is “in-line”, tune the sound on the effects panels and amplifier.
Before recording, you should get the same sound quality that you want to achieve during the process. Such an approach will save you’ time and effort a lot.
Isolating the amplifier
If your recording takes place in a small room, an amplifier standing on the floor can resonate with the floor. Inevitably, sound quality will suffer. You will get unwanted low frequencies in your recording, which will make it sound “dirty”. Avoiding this is simply separating the amplifier matter from the surface.
Get to know your amplifiers
Your amplifier performance has a major impact on your recording quality. Tube-based products have a certain “starting point” upon reaching which the sound changes. It gets softer, deeper and more “tube”. It is not always a good thing; in some cases, a song requires a completely different sound.
It is also generally agreed that amplifiers sound best at 70-80% of maximum volume. This applies to any type of amplifier, tube or transistor. However, it is not necessary to “push” the volume immediately but to allow time for the amplifiers to warm up. It should be remembered that sometimes a small, low-power amplifier is more appropriate than a 100-watt unit.
Musicians should be their equipment capabilities aware and know exactly when it will reach change a point, so they can exploit the feature to their advantage.
Be aware of the room’s characteristics
Both instrument and amplifier sound depends on the room size and shape in which they are located. Operating an amplifier with power in a small room can result in standing waves. To avoid such unwanted phenomena, the unit should be mounted at a 45-degree angle to either wall. Such placement will prevent sound waves from amplifying.
Change the frequency with the microphone
Guitars and amplifiers usually have tone control knobs. These are easy to use, but there is overdoing it a danger and getting too harsh a sound. There is another way to adjust the sound – by changing the microphone position concerning the speakers.
The closer the microphone is to the speaker centre, the more treble and bass there will be in the recording. Moving the device away from the centre will result in a richer midrange. Changing the microphone angle concerning the speaker centre also affects the sound. Moving it at a 45-degree angle away from the sound source will reduce the upper midrange. Moving it in the opposite direction will add low midrange frequencies to the sound.
The microphone has a significant effect on the amplifier tone. Often, simply replacing this device can qualitatively improve a track sound or blend it into the mix. Two microphones will allow you to select the best track, or mix them. However, it’s best to start your search for the best sound with just one microphone.
Start creating beats and songs in minutes. No experience needed — it's that easy.
Get started