Mixing drums

Mixing drums is one of the most important and problematic stages in the process of creating a musical composition. In modern music, it is generally accepted that the right combination of kick and bass is 90% success.
If you’re new to production, concepts like equalization, compression, panning, reverb, etc. can be confusing. This article is intended to immerse you in the most accessible form in the process of mixing drums, so that any beginner can master this skill as well as a well-known professional and can start creating their own hits.
The basis of mixing a mix is the arrangement of instruments in space, which is regulated using such parameters as volume (closer – farther), panning (left-right), equalization (higher-lower).

Tire tuning
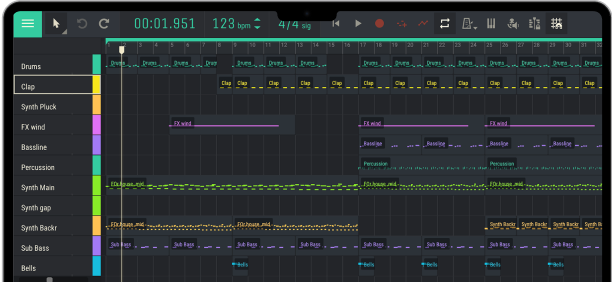
Bus setup involves routing incoming audio signals from a recording or internal instruments to different mixing buses, where these signals can be processed individually. If you use several microphones for a single instrument (for example, kick, hats, snare, etc.) when recording, and thus want to get a common sound, then it is better to send signals from them to one bus so that you do not have to mix each of them separately.
In essence, bus distribution is the routing of audio signals in order to further place it in the overall mix of the track.
Creating a balance
Striking the right balance involves setting balanced volume levels for each instrument. For these purposes, it is better to drown them all out for a start. Next, you need to gradually raise the volume levels so that each of the instruments can be heard clearly and they sound balanced relative to each other.
In a drum part, the snare is usually the loudest, followed by the kick and toms. Everything else should be set at your own discretion, but in order to better navigate, it is better to compare the picture of the volumes of individual elements of the mix with some ready-made reference composition. For example, take some well-known track that you like, and focus on it in terms of volume levels.
Equalization
This step is fundamental to the creation of the entire mix. Equalization allows you to change the nature of the sound, change the frequency characteristics of a particular instrument, correcting the effect of its location in height.
For these purposes, special effects are used, which are in each sequencer and can be connected as external software modules.
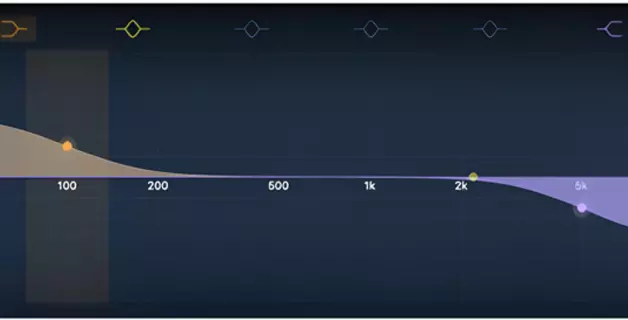
Kick EQ
- For each kick, it is recommended to remove the low-frequency rumble, which is located up to 50 Hz. It may not be very audible on regular speakers, but on large monitors that play on dance floors, such artifacts immediately pop up;
- To enhance the body of the kick or its main kick, it is recommended to increase the frequencies between 60 and 120 Hz. This will make it denser and more saturated;
- Often, drums have some sound turbidity at frequencies of about 250 Hz, so it is recommended to attenuate them;
- In the interval of 250 Hz – 1 kHz, there is the so-called room noise, which interferes with most instruments (synthesizers, etc.), the main sound range of which begins precisely in this interval, so it is better to mute it too;
- If you want to emphasize the click in the kick, then you will need to raise the frequencies in the range of 1-5 kHz.
Equalization of the snare drum
- Remove low-frequency rumble with a high-pass filter (up to 100 Hz)
- Increase or decrease the base frequency of the snare (between 150 and 250 Hz)
- Remove haze or squareness in the lower middle (between 250-500 Hz)
- Remove ringing in the snare drum with a narrow band (from 500 Hz to 1.5 kHz)
- Increase 3 – 5 kHz to emphasize sharpness and attack
- If you want to add hiss and air, boost the 8kHz or higher frequency with a high shelving filter
EQ toms
- Cut the mids to get rid of the boxy sound (250Hz and 1kHz)
- Boost the low frequencies (80-100 Hz for floor toms and 250 Hz for smaller toms)
- Remove low-frequency rumble with a high pass filter (up to 100Hz)
- Remove haze at low frequencies (about 250 Hz)
- Add attack by boosting from 5 kHz to 7 kHz, depending on the volume size.
EQ for cymbals and overheads
- Pass the high frequencies of close mic cymbals (up to 300 Hz) to make room for other low frequency instruments
- Remove haze at low frequencies (about 250 Hz)
- Remove boxing or excessive room tone in the midrange (between 250Hz and 1kHz)
- Make room for the vocals with a slight notch around 5 kHz
- If you want to add sparkle and shimmer, raise the frequency above 8 kHz with a high frequency shelf
Drum Compression
A compressor is a useful tool if you want to learn how to mix drums because it allows you to control the dynamic range of your sound.
Most often used to ensure that there are no too quiet sounds in the mix.
You can use the compressors in different ways to shape the drum sound.
For example, if you want a punchy and tight snare, you can use a fast attack and a 4:1 release.
If you want a soft and rounded kick, you can use slow attack and cooldown with a small ratio of 1.2:1.
The compressor takes the sound and reduces its volume if it exceeds a certain threshold, so you can reduce the volume of the entire track and make sure nothing is lost.
The first way to do this is to use a slow attack time.
Attack time is the time it takes the compressor to start or wait before compressing the signal.
When you have a slow attack time, you skip those low, loud sounds before you apply compression.
This allows the big bass hits to sound full and rich, while compressing everything else so they stay steady and consistent in volume throughout the song.
The second way to use compressors on drums is to have fast attack times.
This gives those low sounds less room to breathe, which can be great when you want a punchier kick or snare sound.
Reverberation
Reverb is a very popular effect that can be used on many different instruments, but is especially important if you want to learn how to mix drums.
This helps to create depth in the sound by adding artificial reflections to the signal.
This can help you give the impression that your drum sounds are in a much larger space than they actually are.
It is important to note that reverb should be applied after processing the drum sound with EQ and compression, so that you do not accidentally affect any of these settings by adding reverb.
When mixing drums, you can use different reverbs:
- Room Reverb: Gives the impression that the drums were recorded in a room, giving them an authentic feel.
- Chamber Reverb: A good choice if you want your track to sound natural, non-electronic.
- Hall Reverbs: Provides a spacious and epic sound, so they’re great if you want to create a stadium or “live concert” feel for your track.
- Plate Reverb: Give your track an “old school” vibe and make it sound like it was recorded in an earlier era.
Noise Reduction and Crosstalk Gain
As you learn how to mix drums, you can use noise gate and transient enhancement to your advantage.
The noise gate is designed to eliminate unwanted drum sounds, while the transient boost helps emphasize attack and sustain.
First, let’s talk about noise cancellers.
This process is just a way to get rid of any frequencies you don’t want in your track.
You can set the threshold for the gate. Once the signal reaches this threshold, it is simply muted.
This is a great way to keep your mix clean and free of distortion, but you have to be careful not to accidentally cut out parts of your sound that are actually intentional.
On the other hand, temporary amplification is a completely different method that leads to the opposite effect.
Instead of muting sounds above a certain frequency threshold, you can use a temporary boost to make those sounds louder.
This is great for emphasizing certain aspects of your drum mix, such as attack or sustain.
Emphasis of percussion in a mix
The volume of the drums will depend on what you are trying to achieve.
If you want them to be loud and aggressive, make it louder.
However, if you want them to be thinner, you should turn down the volume.
If you want to make your drums stand out a little more, here are some tricks:
- Equalizer drums to taste.
- Reduce some of the low frequencies of other instruments in the mix if they compete with the kick.
- Put the compressor on the kick drum and adjust it so that it starts swinging at about -4 dB. Then lower the threshold as much as possible without making the sound unnatural or “soft”. This will make the kick sustain a little longer and sound louder than if it hadn’t been compressed.
Should I mix the drums first?
When mixing a song, one often hears several different strategies for how to start learning how to mix drums.
Some engineers may say you should mix the drums first, while others say you shouldn’t.
Let’s check the advantages and disadvantages of both approaches.
Advantages of mixing drums in the first place:
You will get a better idea of how to handle the rest of the instruments in your mix.
This is especially true if your song uses a guitar or other percussive instruments that can easily get lost in the snare drum. If you’re not careful, you’ll end up with a lot of dirt in your mix by default.
However, starting with the drums will give you a better idea of what frequencies need to be cut to make room for other instruments.
You can save time and make sure everything works smoothly.
Disadvantages of mixing drums in the first place:
The downside of mixing drums in the first place is that it can be difficult to go back and make adjustments later, especially if your song has many layers.
If you need to tweak something on the kick or snare, those changes can affect the sound of the rest of the track.
How to mix powerful drums?
Drums can be quite harsh and cut through the sound easily.
Here are some tips for understanding how to mix drums with a powerful sound.
For a natural tone, start with a slow attack and a fast release.
Most of the initial transient passes through the block without compression when the attack time is slow.
Gradually increase the attack time until you achieve the perfect balance of hardness and harshness. For fast drums, a short release time is ideal.
How loud should the drums be in the mix?
The first thing to do is make sure your drums sound good on their own.
Lower all faders and then listen to the drums again.
Don’t forget the trap!
The snare drum easily dissolves into the mix.
Make sure it cuts through and blends well with everything else.
The next step is to listen to other songs for reference and see if you can find any patterns in terms of how loud the drums are compared to everything else.
It’s a good idea to do this at several different volume levels.
This will help you understand what works best for different musical styles and genres.
How to improve snare drum sound when mixing?
If you want the snare to sound better when mixed, there are a few things you can try.
Here are some tips:
- Use a high pass filter on the track;
- Reduce bass frequency;
- Consider if your reverb is too loud or too quiet;
- Try using a gate to turn off the reverb.
Should you pan the reels?
When you’re trying to make a drum sound fill an entire room, panning is one of your most important tools.
If you want to understand how to mix drums, you should consider panning.
Panning drums to the center
When you pan all the drum sounds towards the center, you get a very monophonic mix where nothing stands out.
When you pan all the drum sounds towards the center, you get a very monophonic mix where nothing stands out.
When you have a lot of instruments in your mix, it’s important to leave room for them.
A good way to solve this problem is to use groups and buses.
You can route all drum sounds to a single bus, and then combine all these sounds together into one sound source, making it easier for you to control that source.
Panning drums in stereo
When you pan the drums across a stereo field, this results in a clear separation between each sound source, and when processed properly, this creates a stereo width without compromising its mono compatibility.
The downside is that if you want a narrower sound, you have to process each individual sound separately, which can be time consuming and confusing.
Should drums be recorded in mono or stereo?
Drums can be recorded in mono or stereo.
Each drum must be recorded as a separate instrument.
Kick, snare and toms are recorded separately with separate mics. That’s why they’re in mono.
On the other hand, the height and room microphones are recorded in stereo.
If you have enough microphones to independently capture the kick, snare, and toms, you should record them in stereo.
This will allow you to mix them separately after recording.
Conclusion
Mixing drums can be tricky for those who don’t know how to make music.
However, if you decide to learn how to mix drums, start with the basics like the mix bus, balance, EQ, compressor, reverb noise gate, and transient.
Many beginners don’t know how to mix drums, they understand the music and know what sound they need.
So, in addition to learning music theory, one of the best ways to improve your drum mixing skills is to take existing songs you like and deconstruct their drum sounds.
Add these components to your own drum mix and practice creating these sounds until you get comfortable with them.
Add these components to your own drum mix and practice creating these sounds until you get comfortable with them.
However, learning every aspect of mixing can help you achieve the best results for you and your mixing projects in the future.