7.3 Saving, Opening, Importing, and Exporting Projects
When working in Amped Studio, it’s crucial to save your projects regularly to prevent data loss. Once you’ve finished working on a project, you can also export it for further use or distribution.
7.3.1 Saving a Project
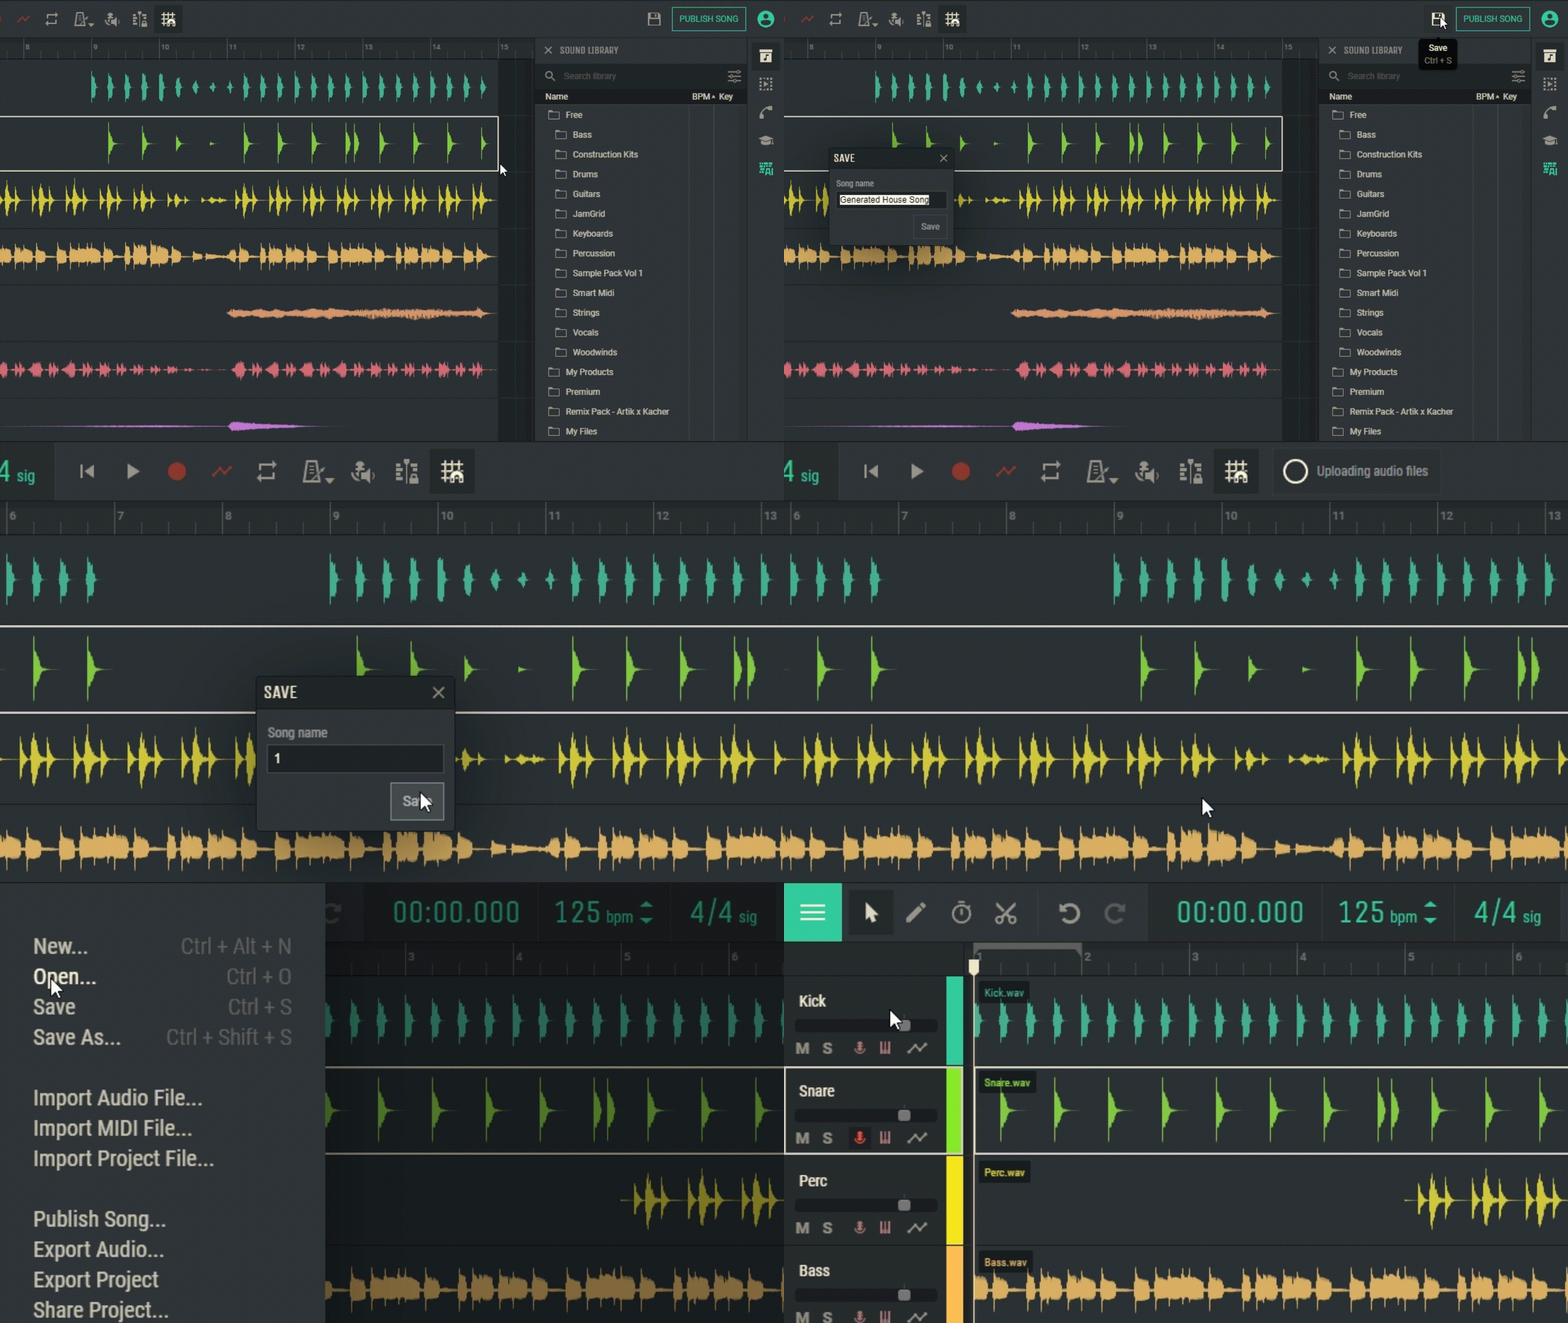
Quick Save: At the top of the Amped Studio interface, you’ll find an icon resembling a floppy disk. This icon is designed for quick saving of your project. It’s highly recommended to use this feature frequently throughout your work on a project.
Manual Save: Navigate to the top corner of the studio and select ‘Save’ from the menu or use the Ctrl+S keyboard shortcut (Cmd+S on Mac). If it’s your first time saving the project, the system will prompt you to name your project and choose a save location.

7.3.2 Opening a Project
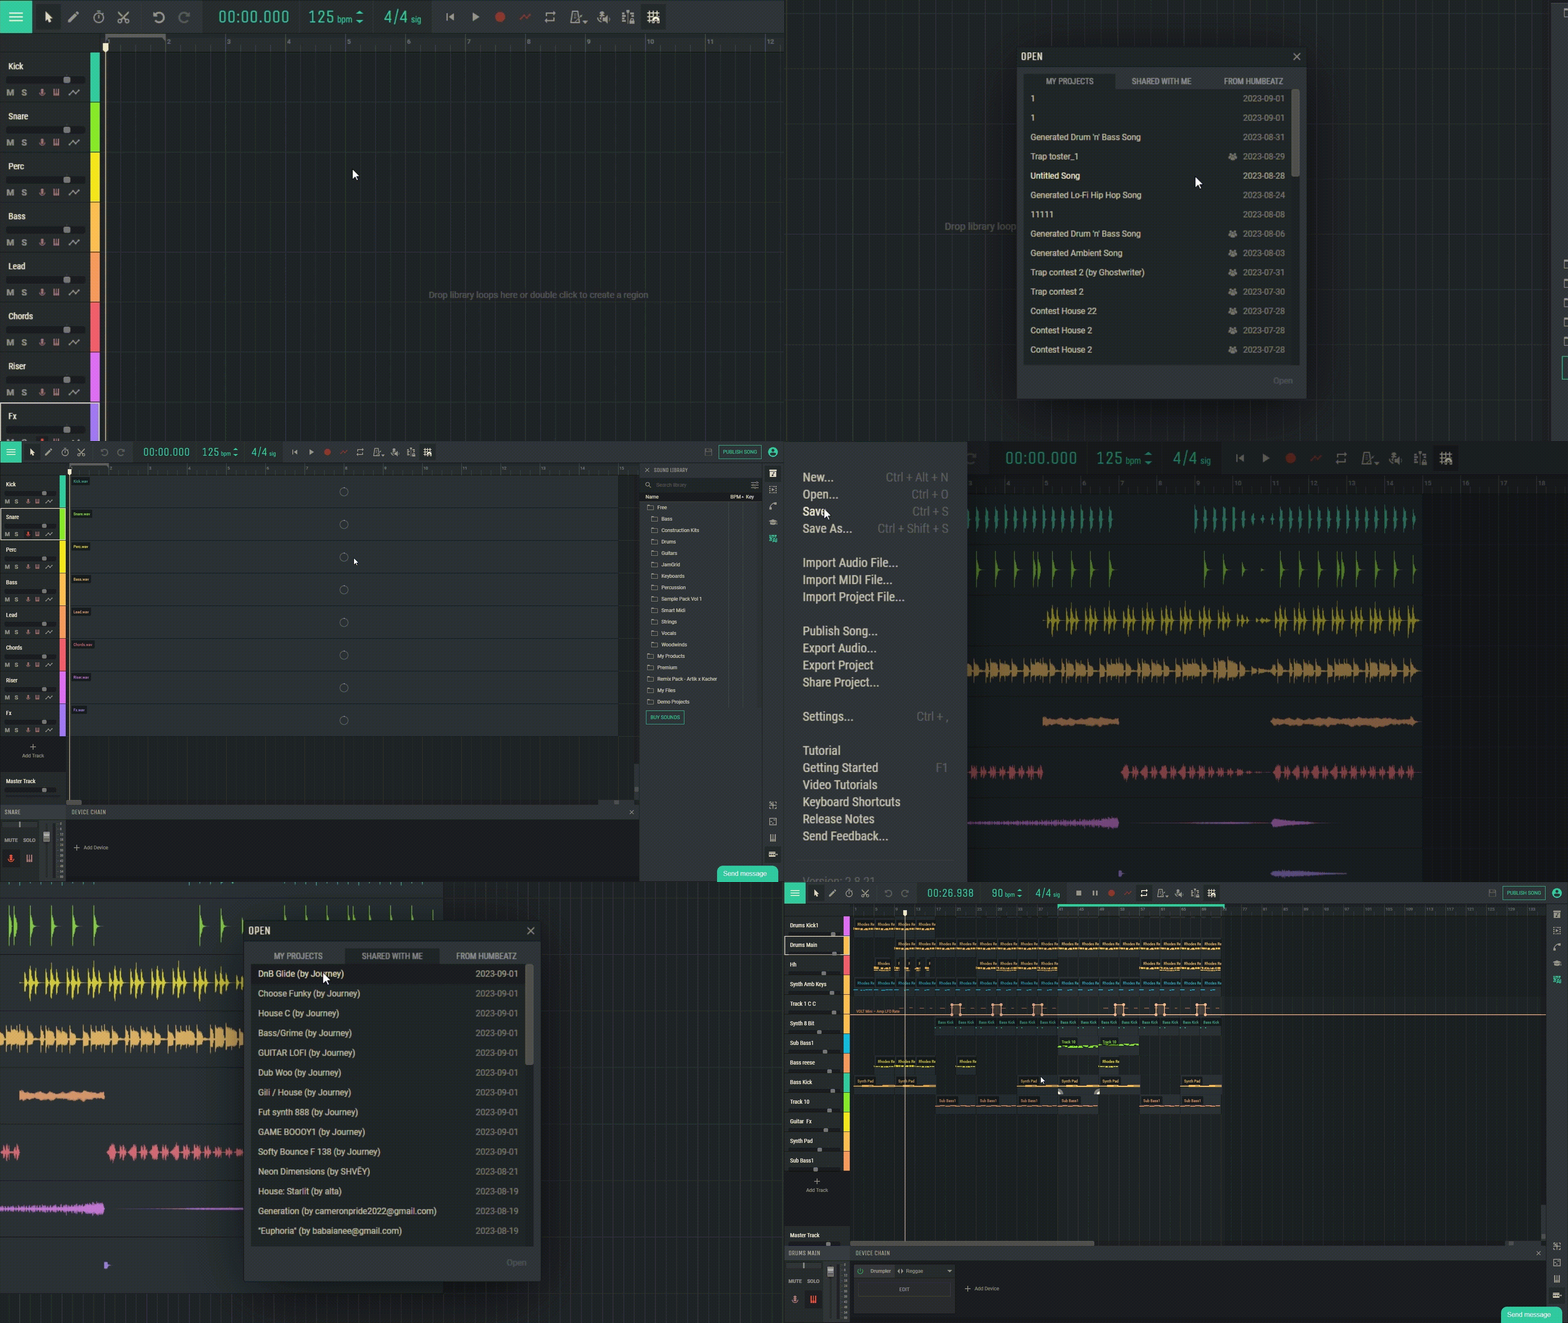
To open a previously saved project, navigate to the top corner of the studio and select ‘Open project’ from the menu or use the Ctrl+O keyboard shortcut. A window will then appear with three tabs:
- My project: This displays all your saved projects.
- Shared with me: Projects that have been shared with you by other users.
- From humbeatz: Projects or templates provided by the humbeatz platform.
Select the desired project from the list and click on it to open.

7.3.3 Exporting a Studio Project
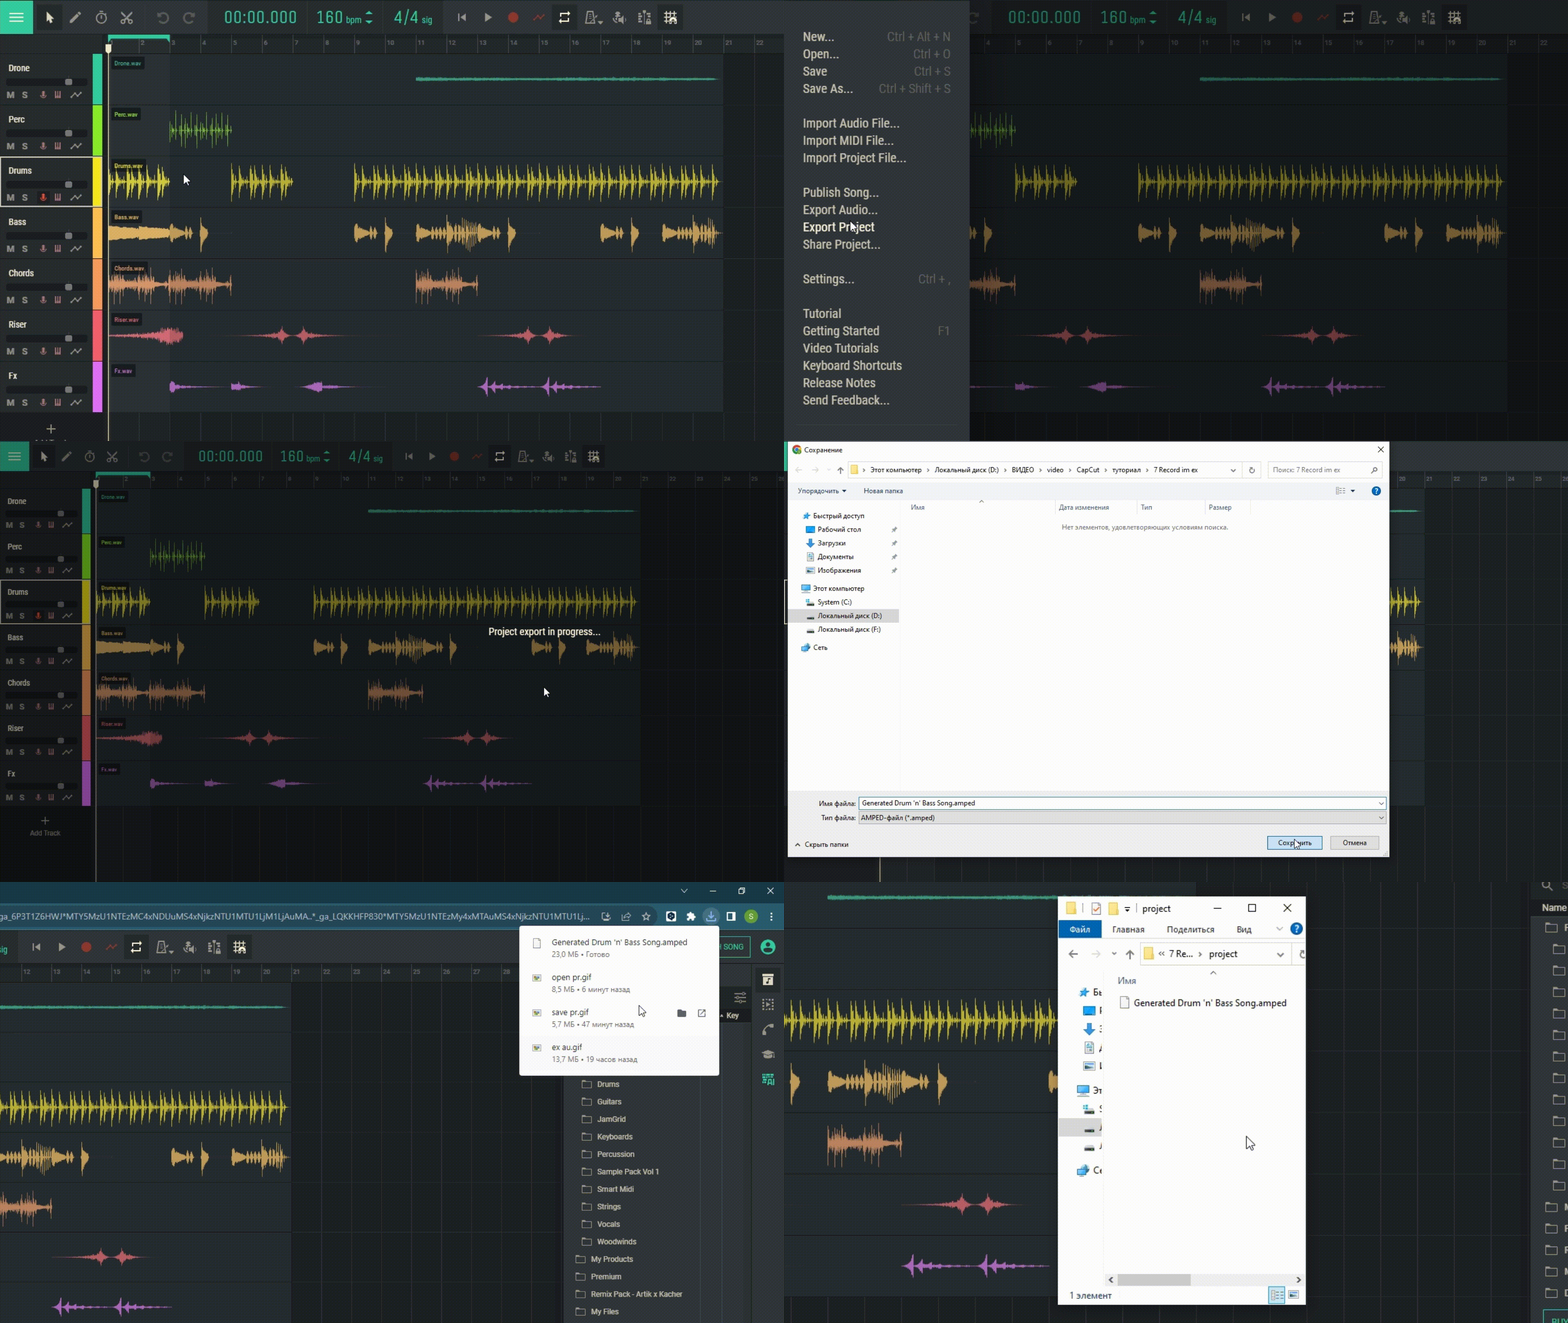
If you wish to export a studio project for backup purposes, navigate to the main menu and select ‘Export project’, then save it in the “amped” format.

7.3.4 Importing a Studio Project
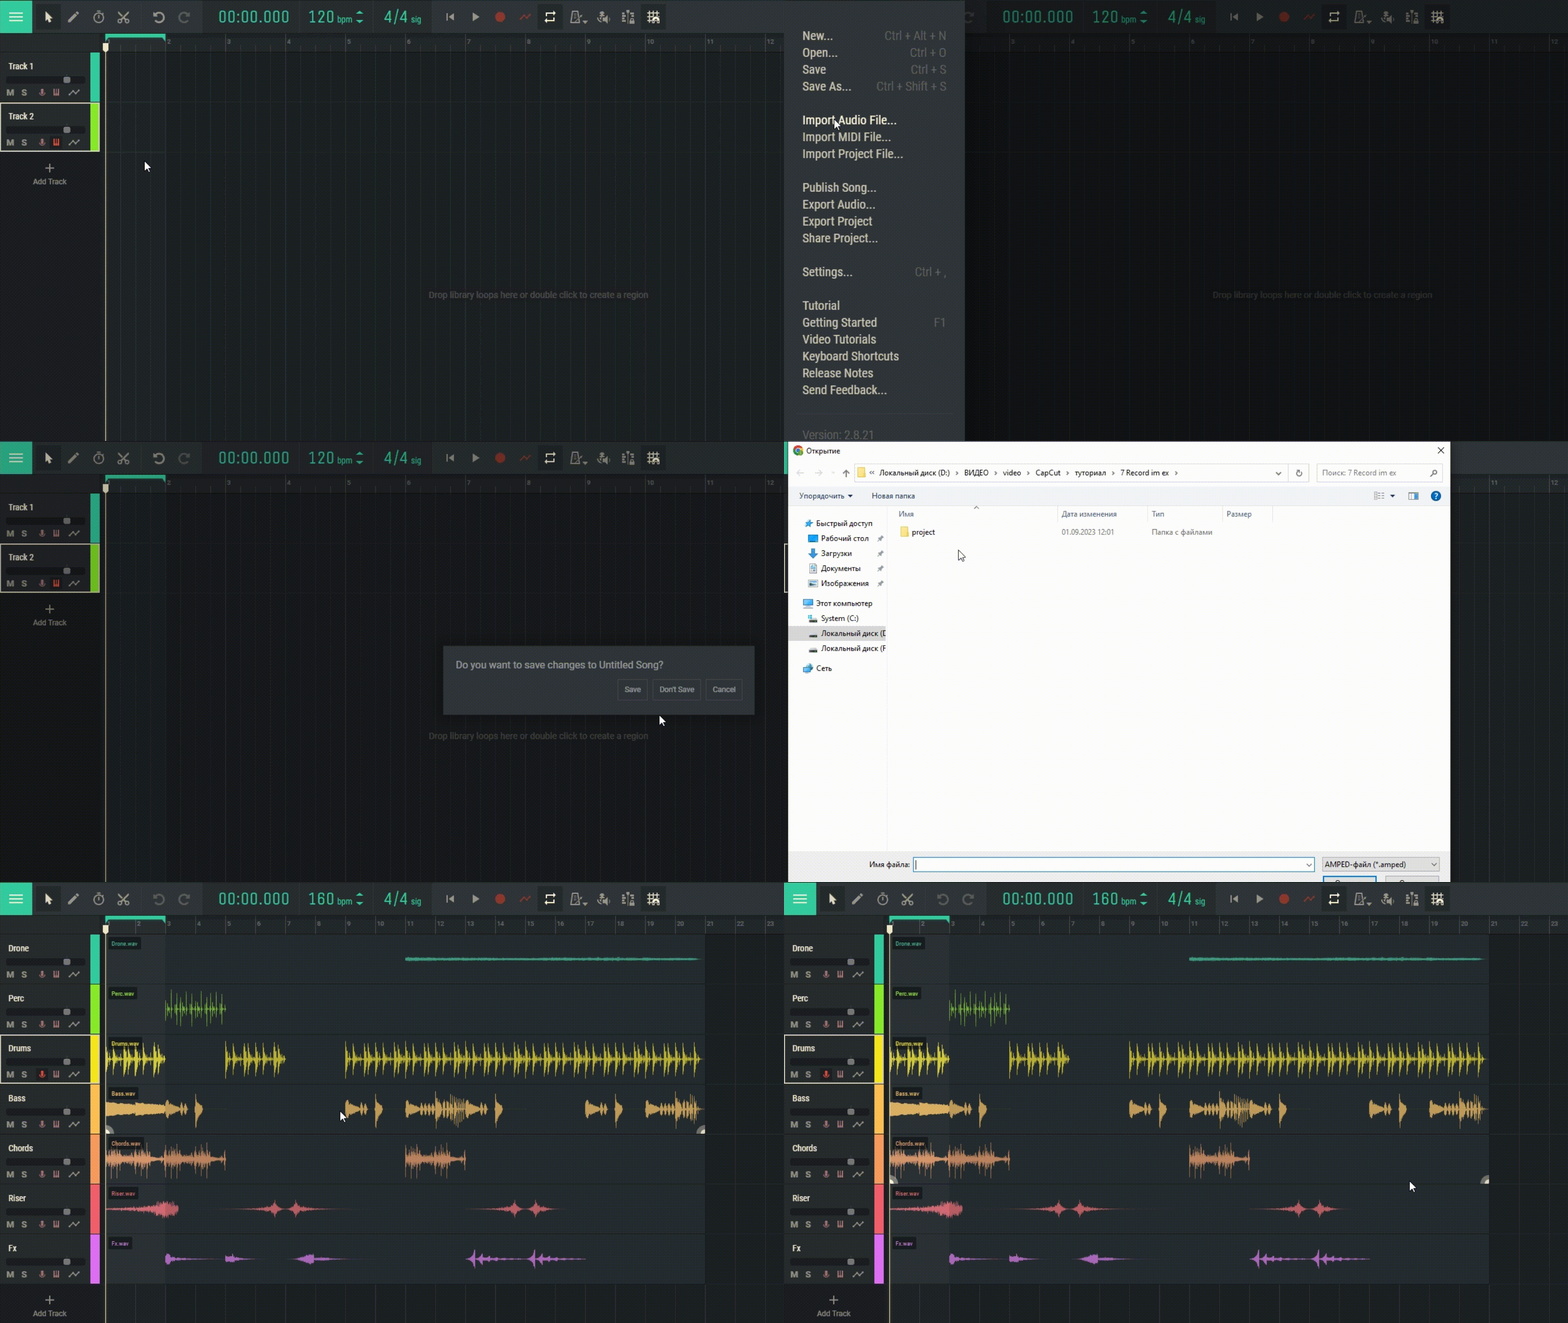
If you have an Amped Studio project file that you want to import, go to the main menu and select ‘Import project file’. Find and select the project file on your computer that you wish to import.

By following these instructions, you can safely save and export your projects in Amped Studio. Remember to back up your projects regularly to safeguard against data loss.

